Blog Posts · Knitting · RCYC · Spring

Yarn smelling, handling, crawling, blogging and how the #100dayproject fits into all of this.

I am still trying to figure out how to wear an asymmetrical shawl. I can’t stand to hide the beading!

Okay, let’s just say it. I suck. I have been an off-again-on-again blogger for so long now that, according to many folks, blogging is really no longer a thing. But since I just graduated with a shiny new English degree with a focus on creative writing, I am yearning to put my recently learned skills to work. So if you are the sort of person who likes to read about things and not rely solely on Instagram Reels for knitterly fiber arts entertainment, I welcome your eyeballs to my blog, out of fashion though it may be. (Just in case, I also do IG Reels because I am a sucker for pretty, fast-moving things)

I also have gone a little wild with knitting and crochet since I turned in that last Writing Portfolio in December, 2023. The tactile sensations of wool and sticks in hand, the joy in the fiber arts community, returning to stocking my already-overstuffed stash that is leaking into yet another closet … all these things fill my creative well like no other. I know you all know what I mean.

Has anyone every approached you and said, “I heard recently that you knitters are very…” their eyes diagonally scan the ceiling as they search for the word … “tactile people … you like to handle yarn in shops … ” that same speaker now slides his eyes diagonally to you and hesitatingly says, “I heard that some people, uh, well …  smell  yarn … ” They stop short of asking you if  you personally do this.

The side-eye steepens sharply as they wait for your reply, though the way they begin to slightly shuffle backwards tells you that they don’t really know if they want to hear it.

But you! You beam, undaunted, as you gleefully jump at the chance to speak about something so magical as the smell of yarn. “Oh, yes, of course! We all love to shove our nostrils into that fresh wool and vinegar mixture.” Maybe you punctuate this with a sniff.

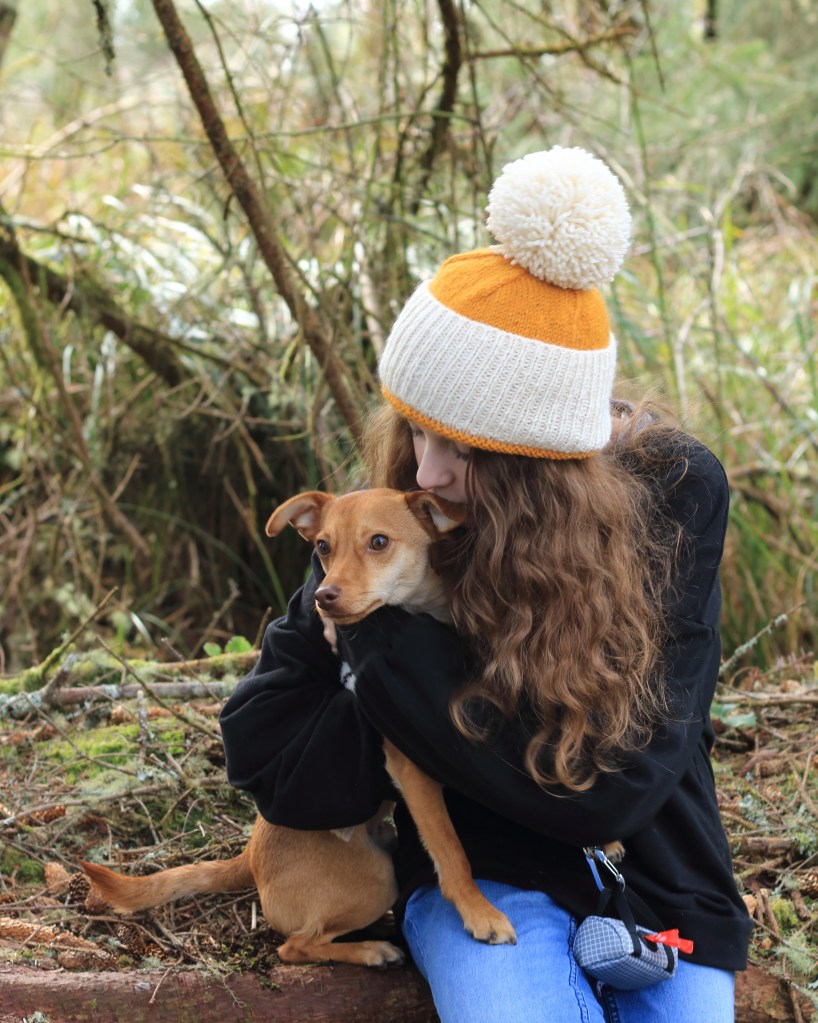
This is where I am, friends. My hands and nose are in the wool. And I am beaming.

My life gained some space just in time, too, for the #100dayproject led by Lindsay Jean Thompson and friends over on IG, and the RCYC or Rose City Yarn Crawl, an annual event that provides a framework (e.g. an excuse) to intensely investigate eight of the finest yarn shops in Portland, Oregon over 4 short days.

I highly recommend both — and if you don’t live within reasonable distance to Portland, Oregon, you might want to check out your own local yarn crawls so you can join us in spirit, as we “crawl” with hundreds of other wool freaks for yarn. There’s something that feels a bit insectile in that word, “crawl…” or like it is meant to characterize an uncomfortably, densely packed Spartan competition that may or may not involve slogging through mud to get past low-hanging barbed wire to reach yarn … or like the exhaustion we experience as crawlers run out of gas literally and figuratively by the end of the yarn crawling weekend …   but I digress… I always, always join this event.

“Chloris” by Makenzie Alvarez of Hanks & Needles has a very Elysian Fields/Hadestown vibe.

As for the #100dayproject, it is a boundless — no, limitless —  DIY frame for any creative who wants to grow their art, share their art, develop it or explore new artistic endeavors. I always join this event, too, but I never feel like I generate enough focus to take me anywhere significant.

So this year, I am combining the two.

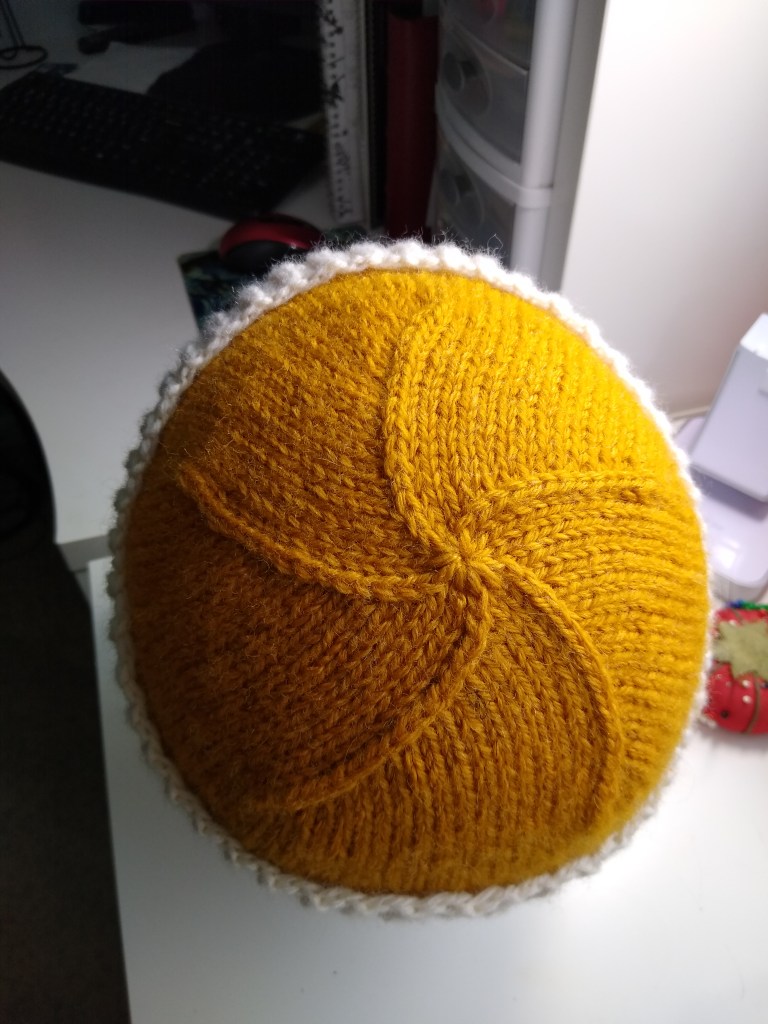
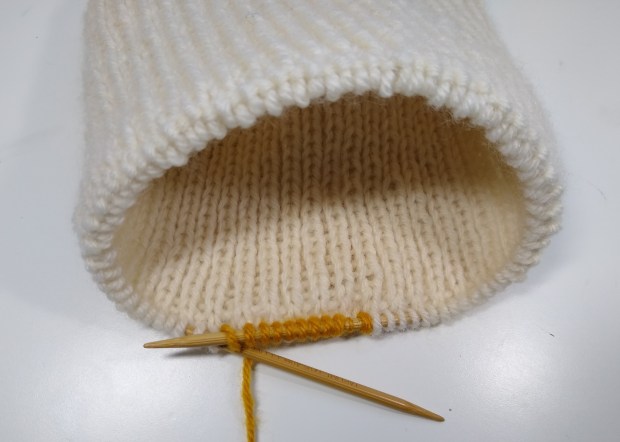
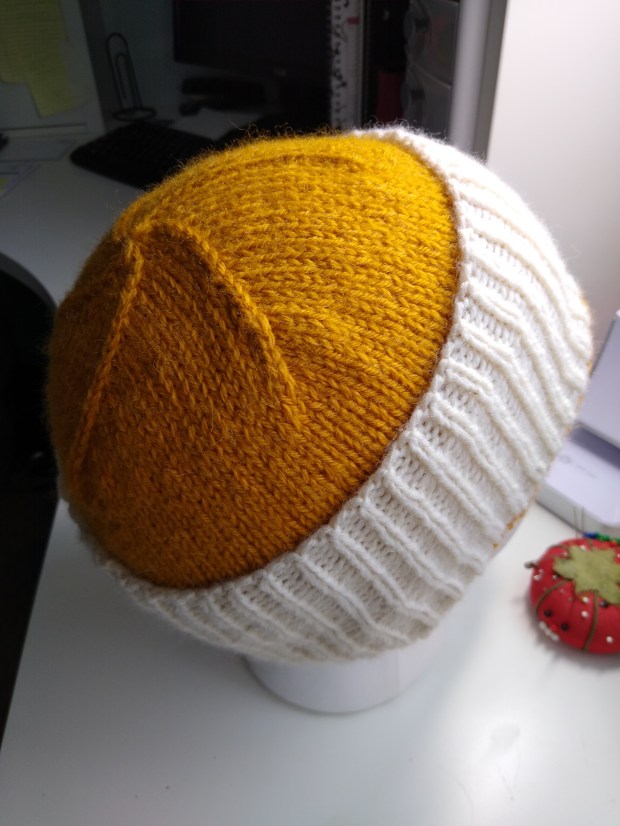
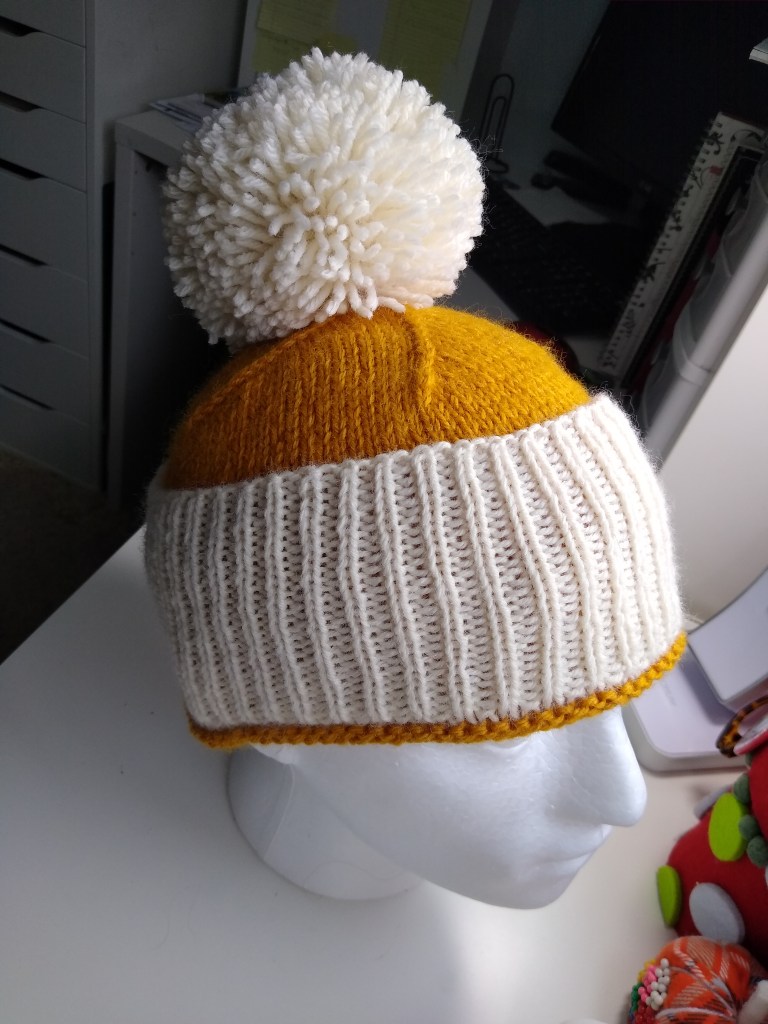
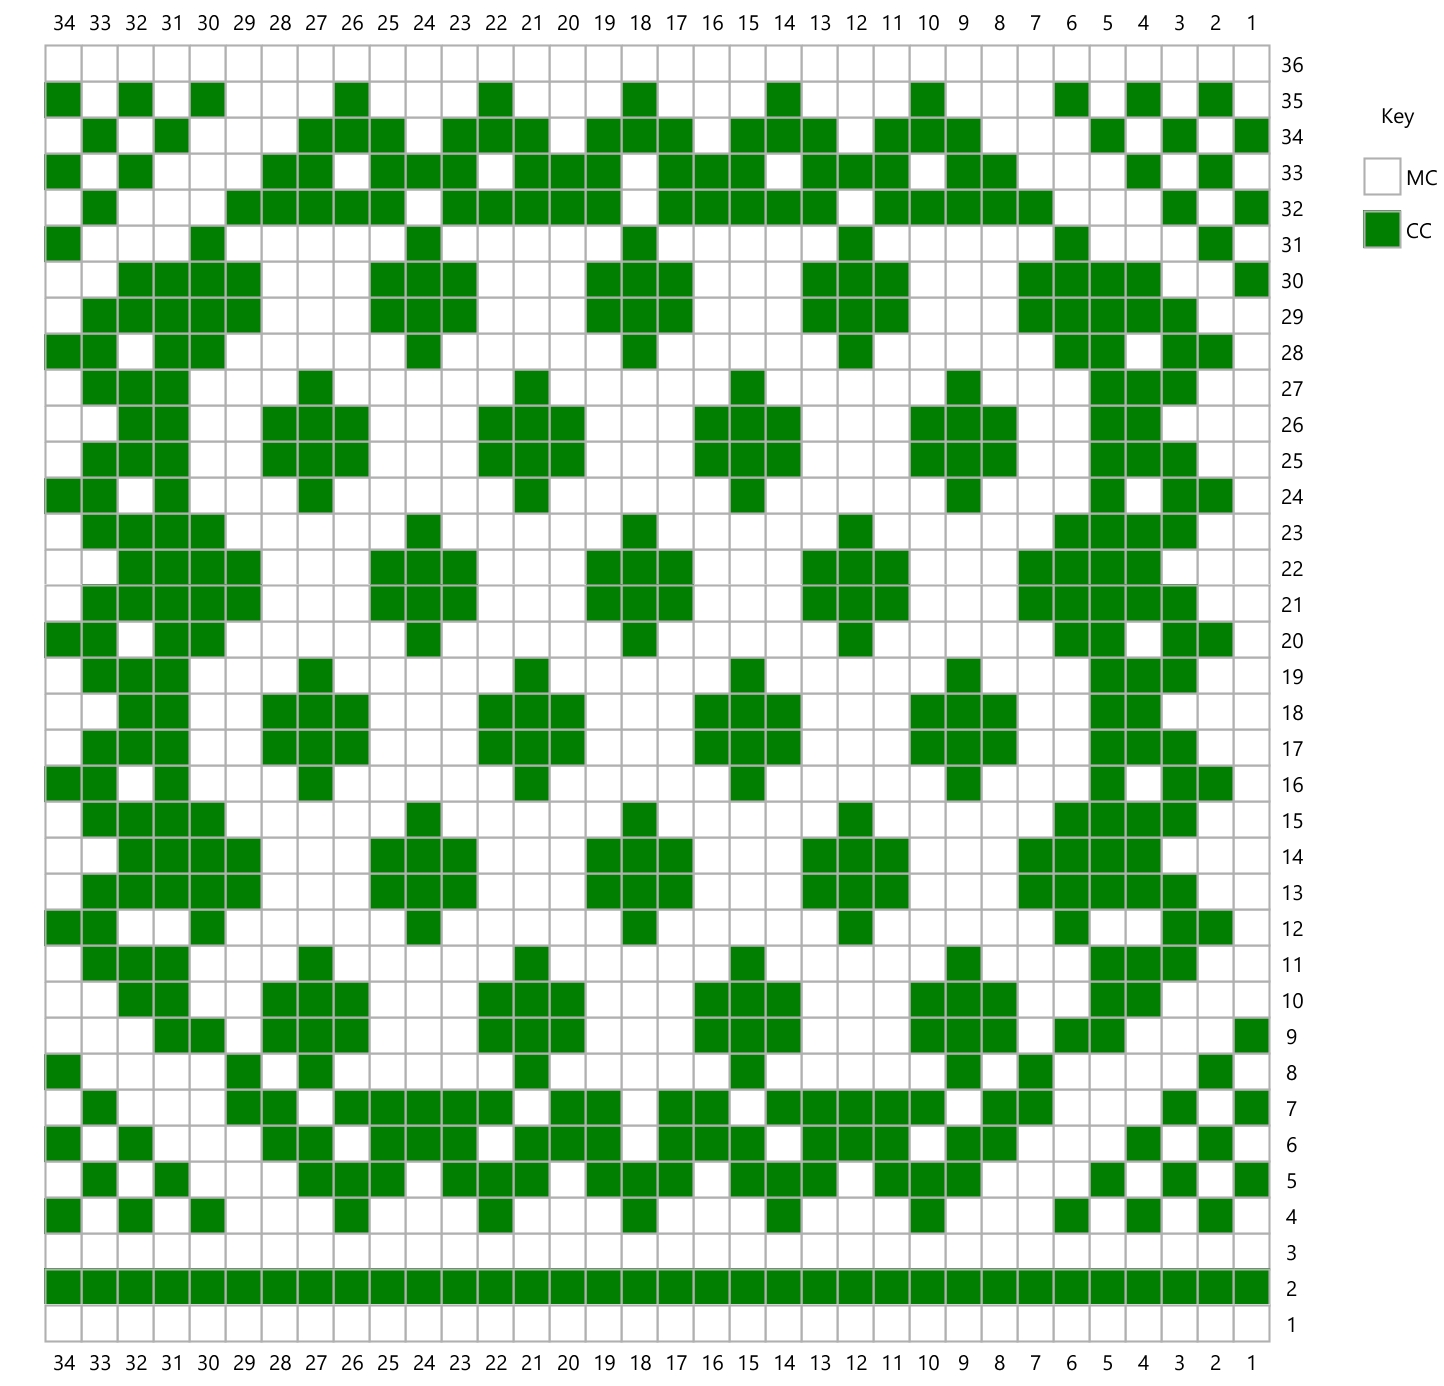
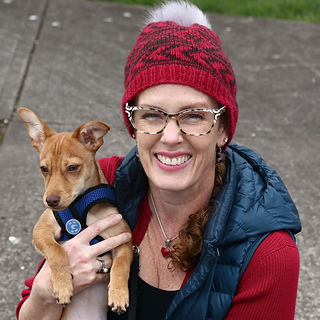
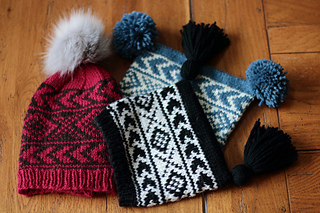
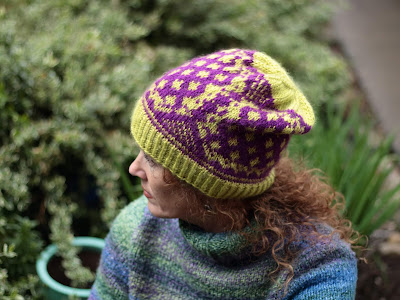
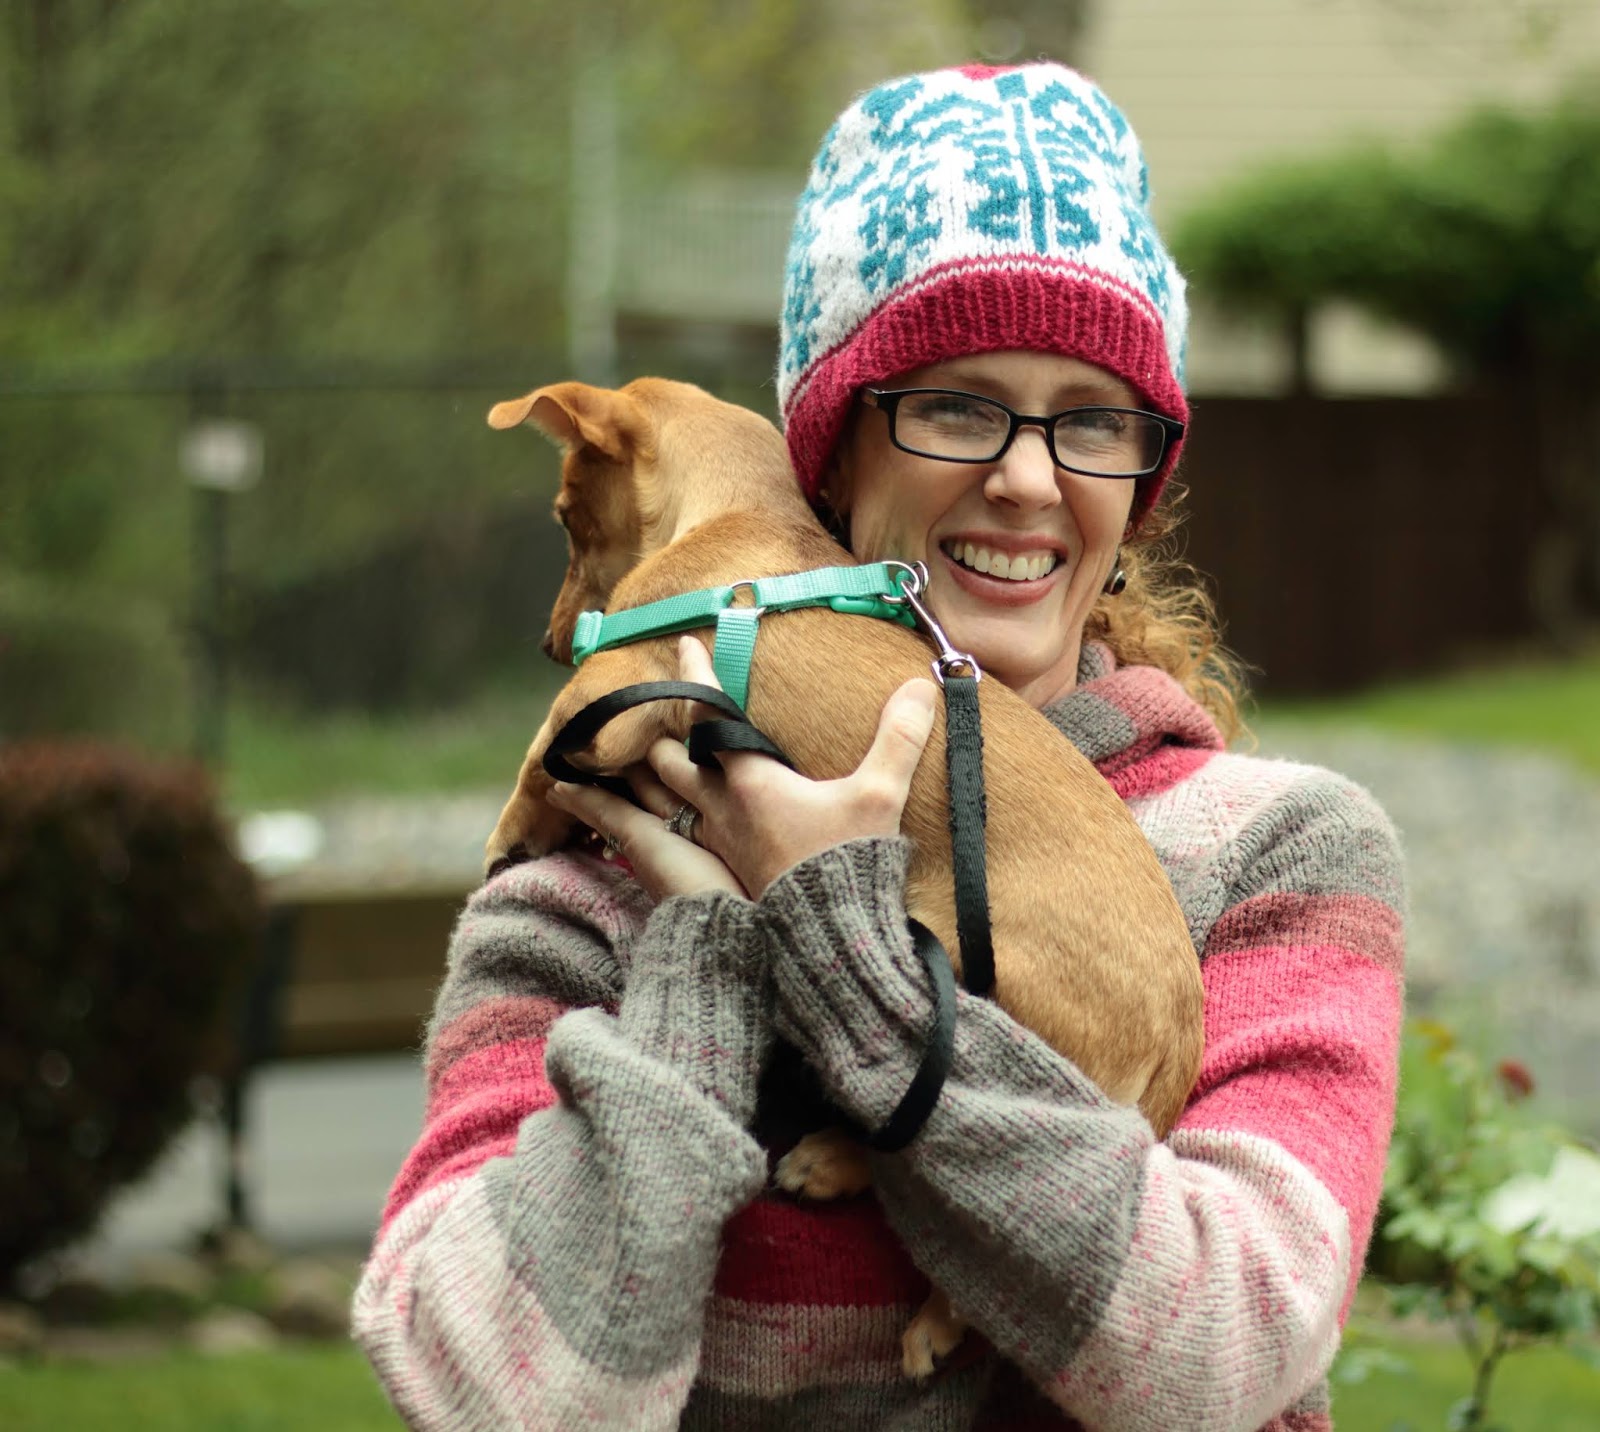
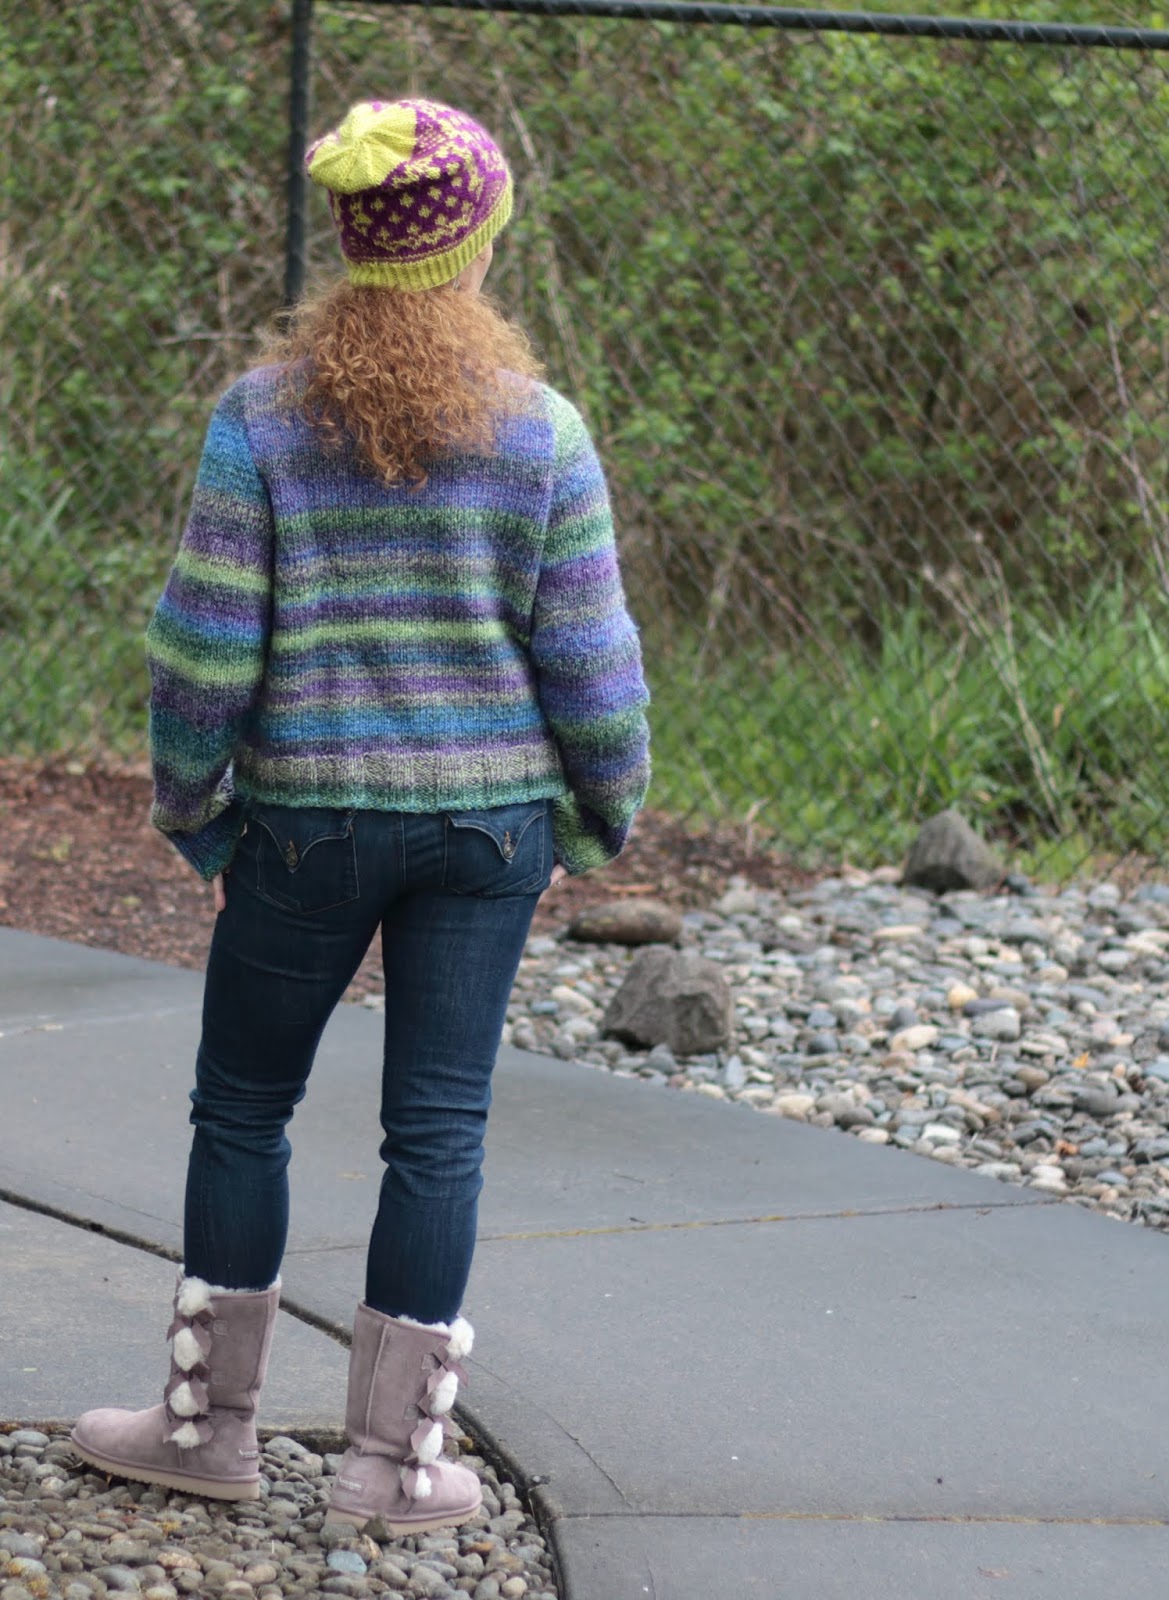
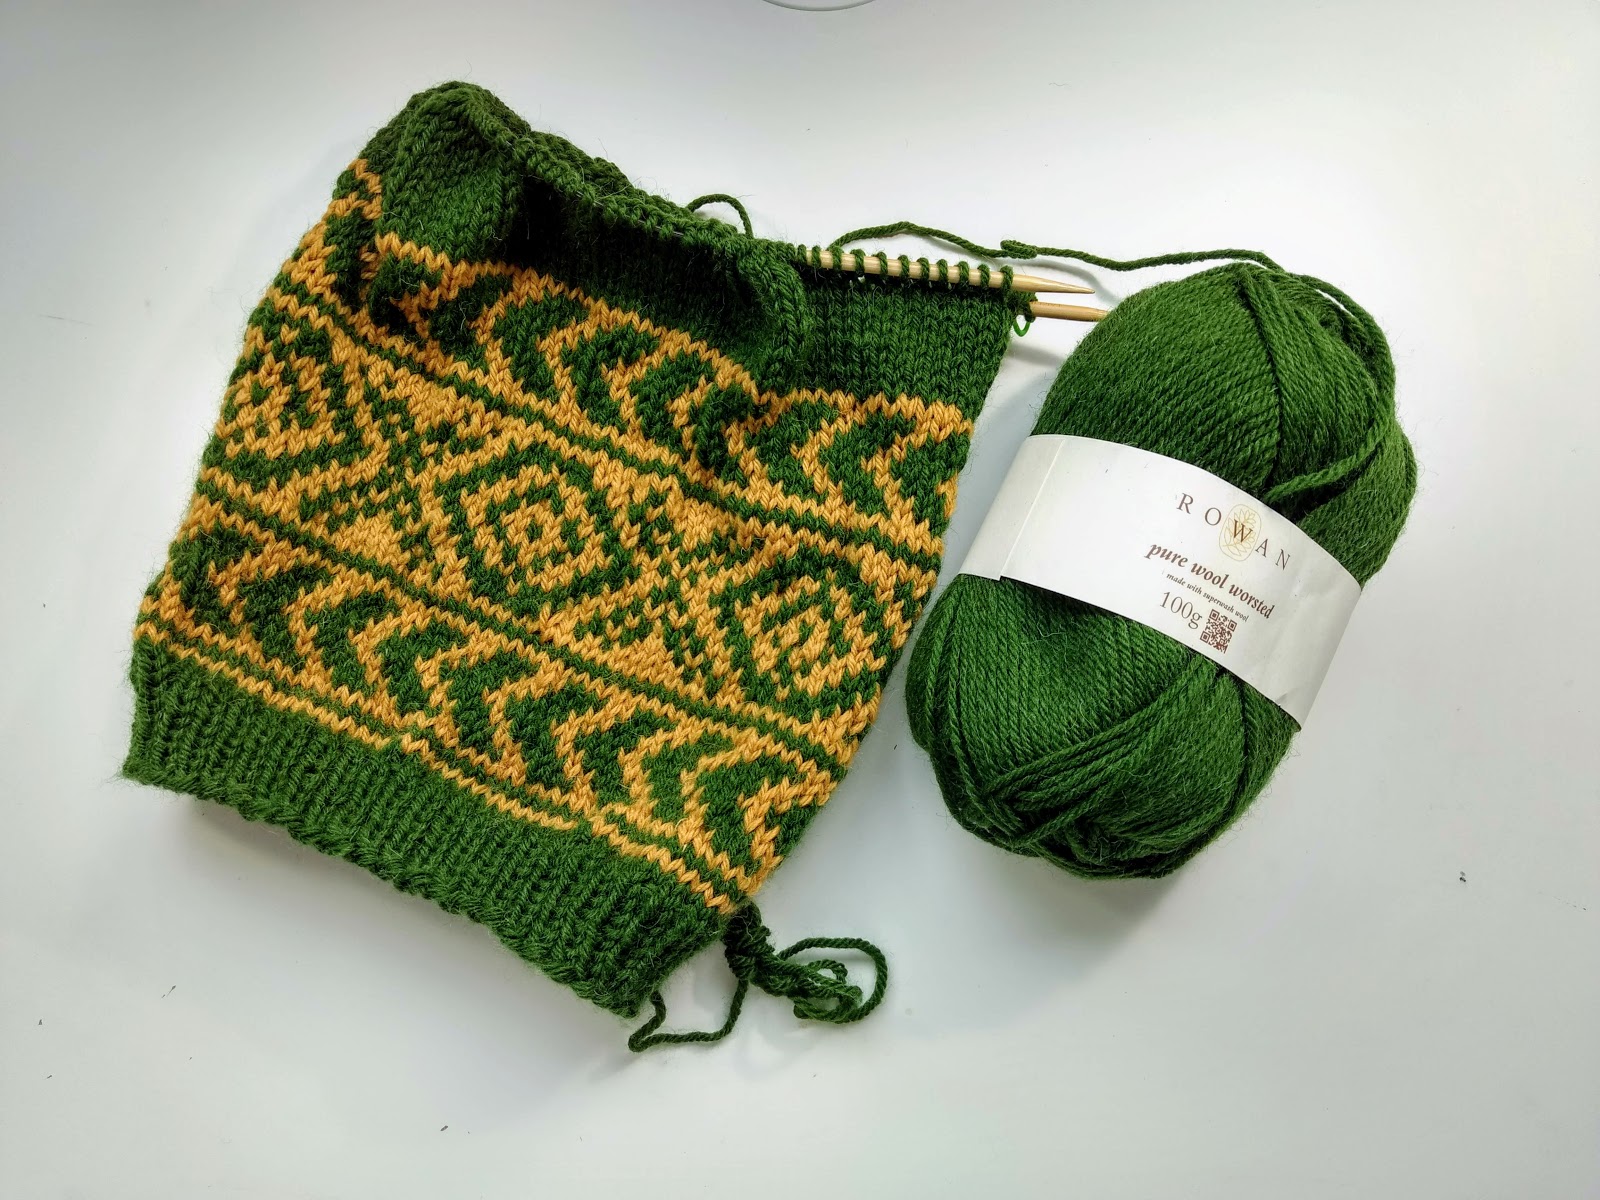
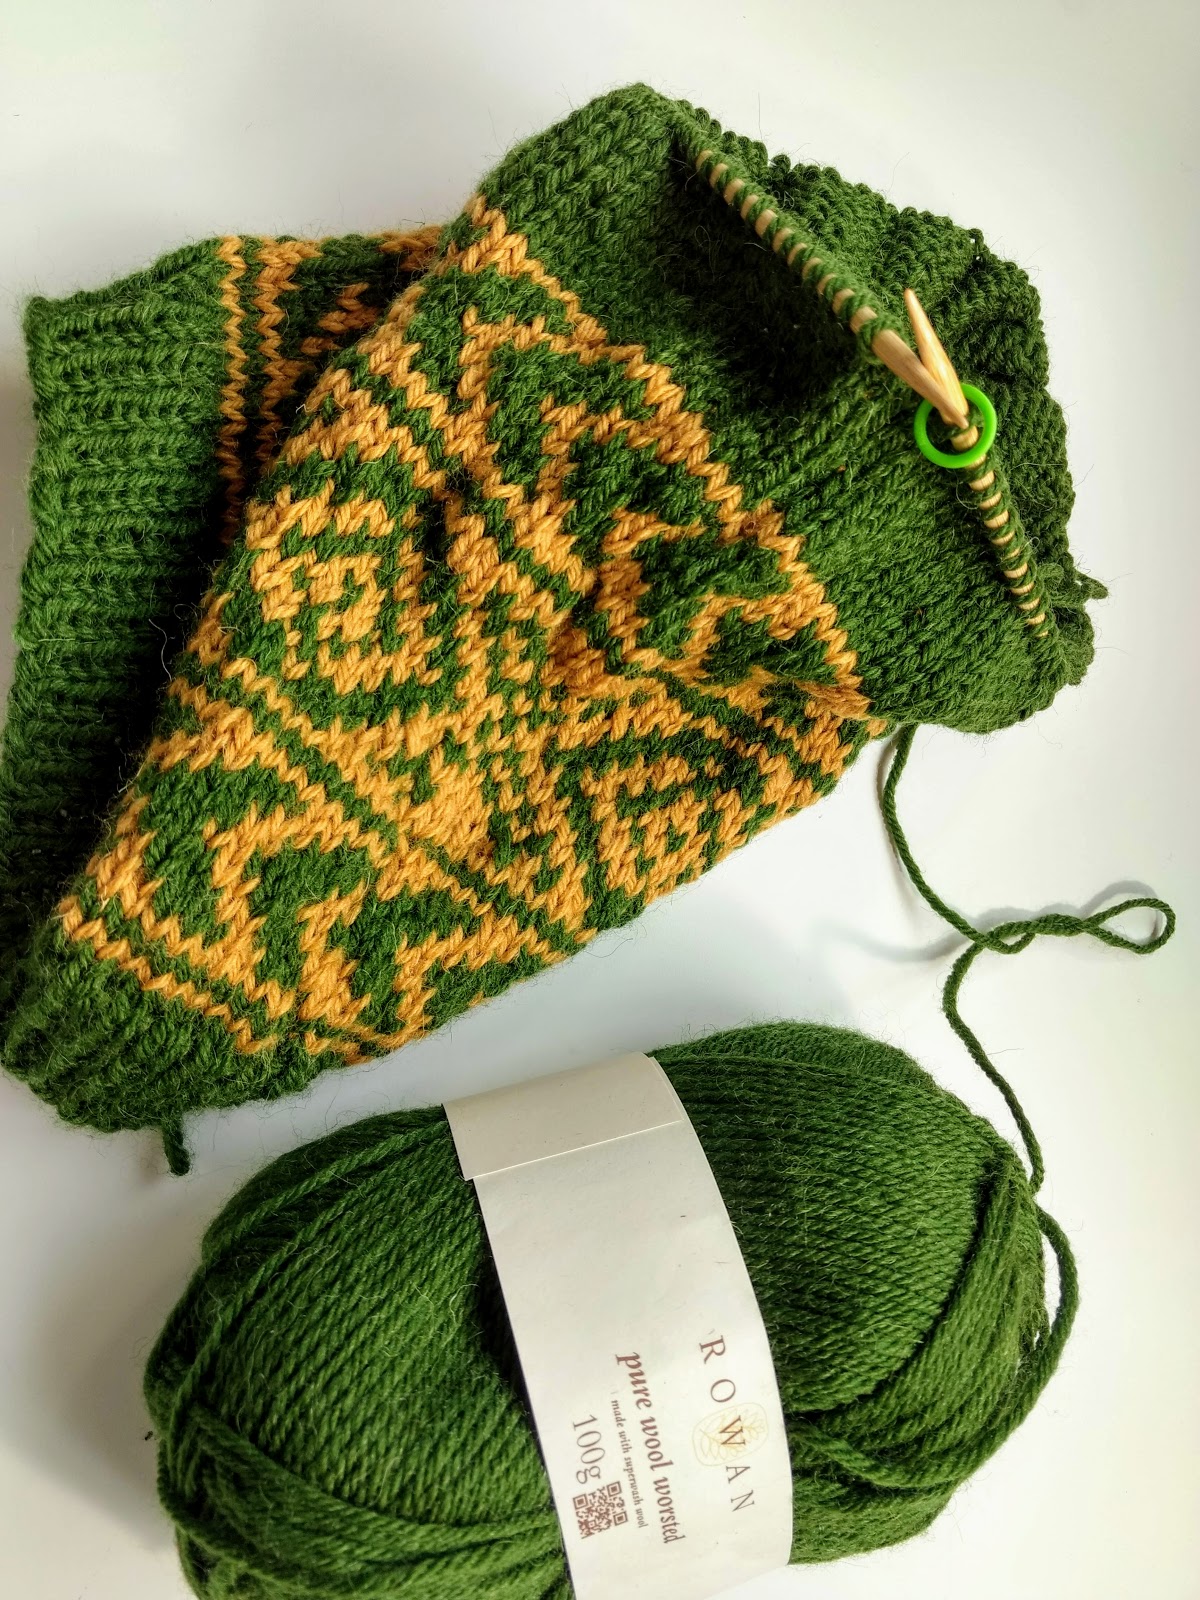
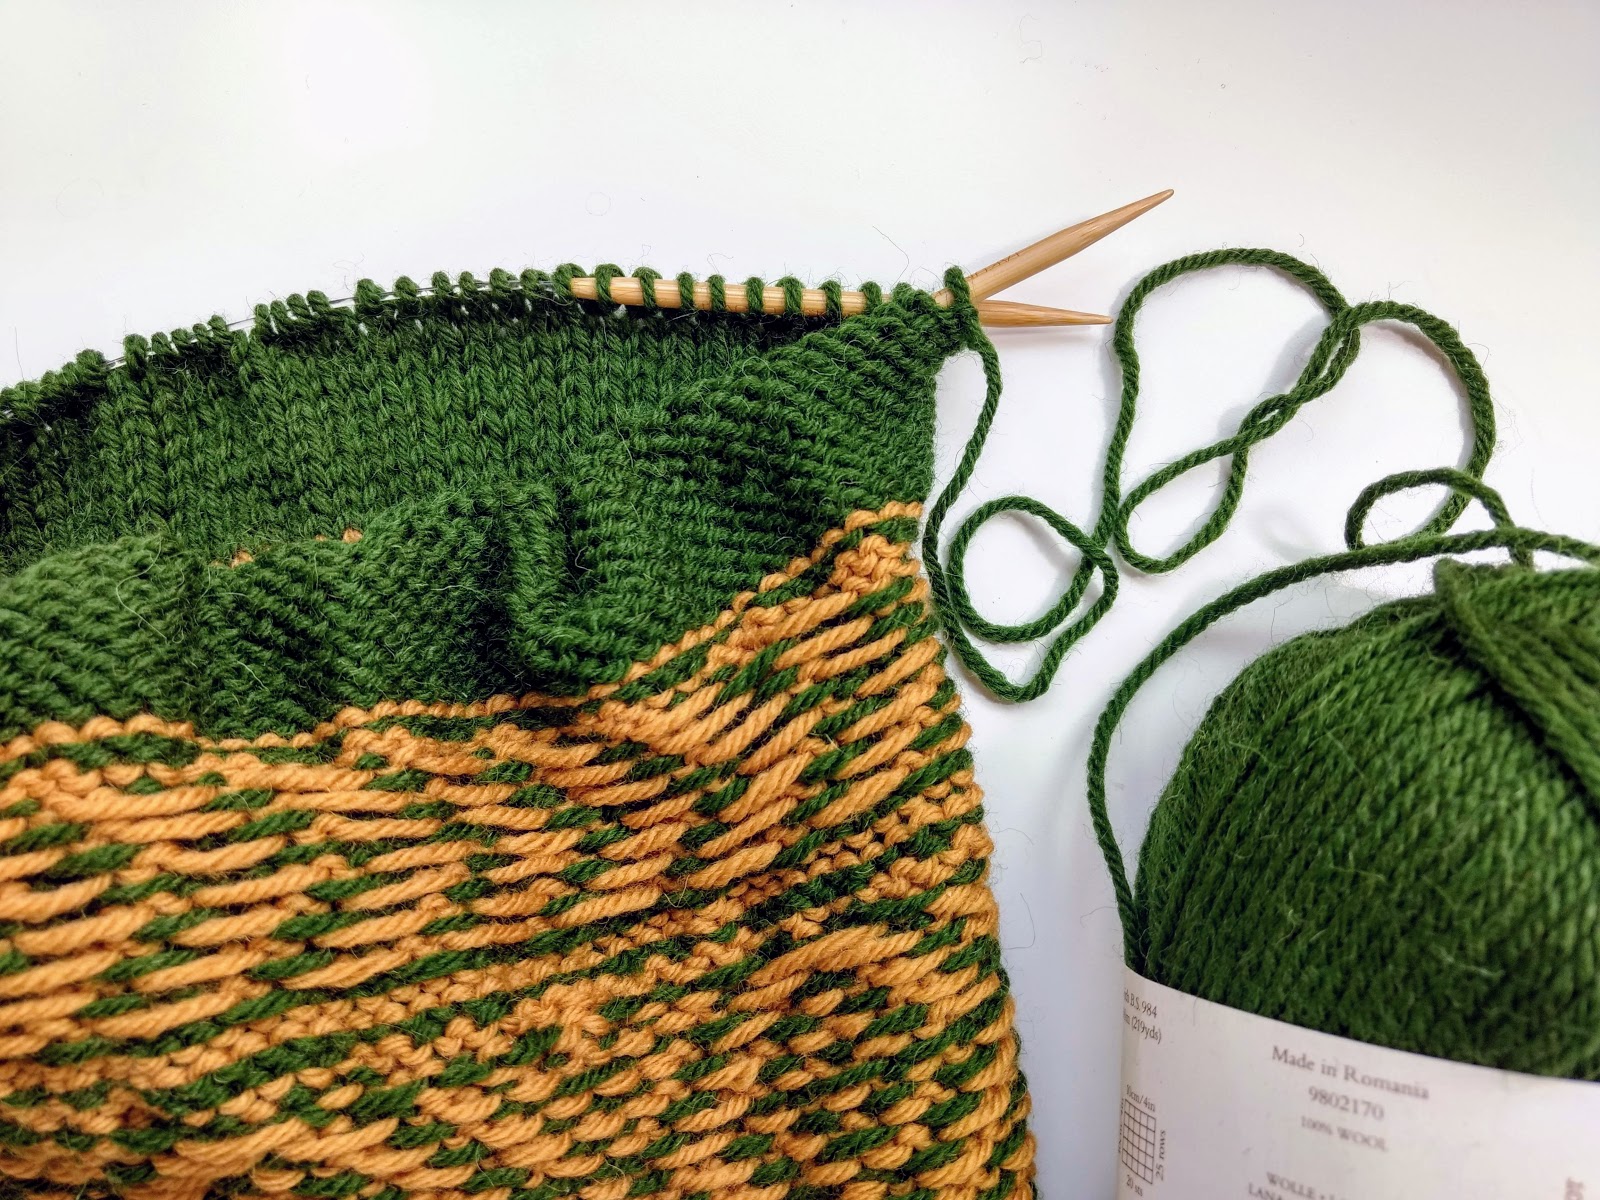
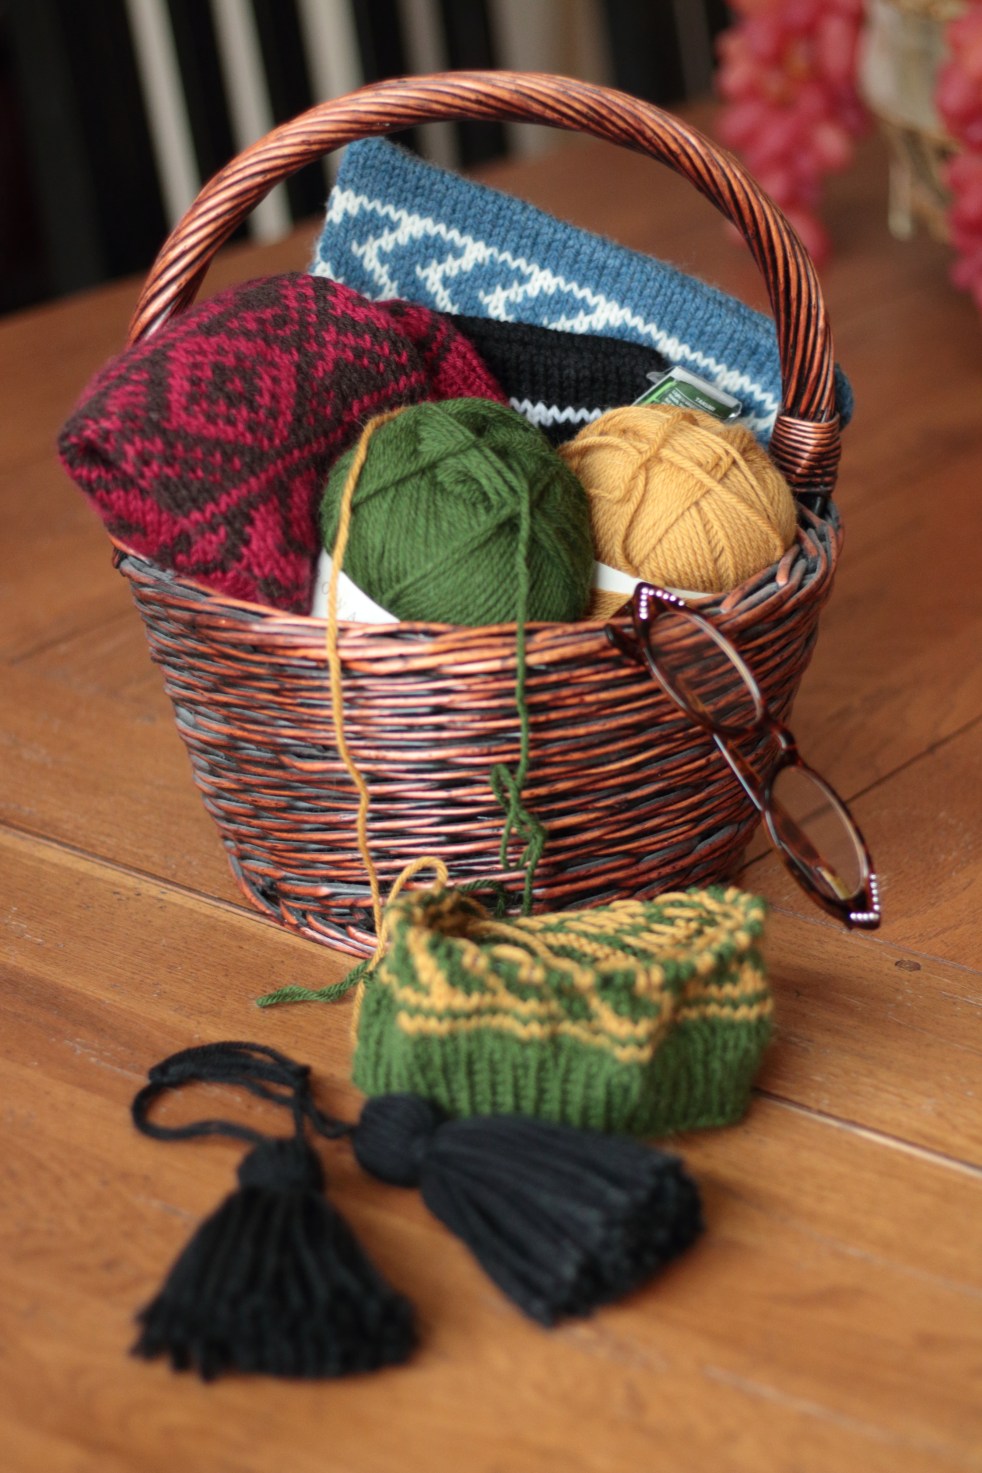
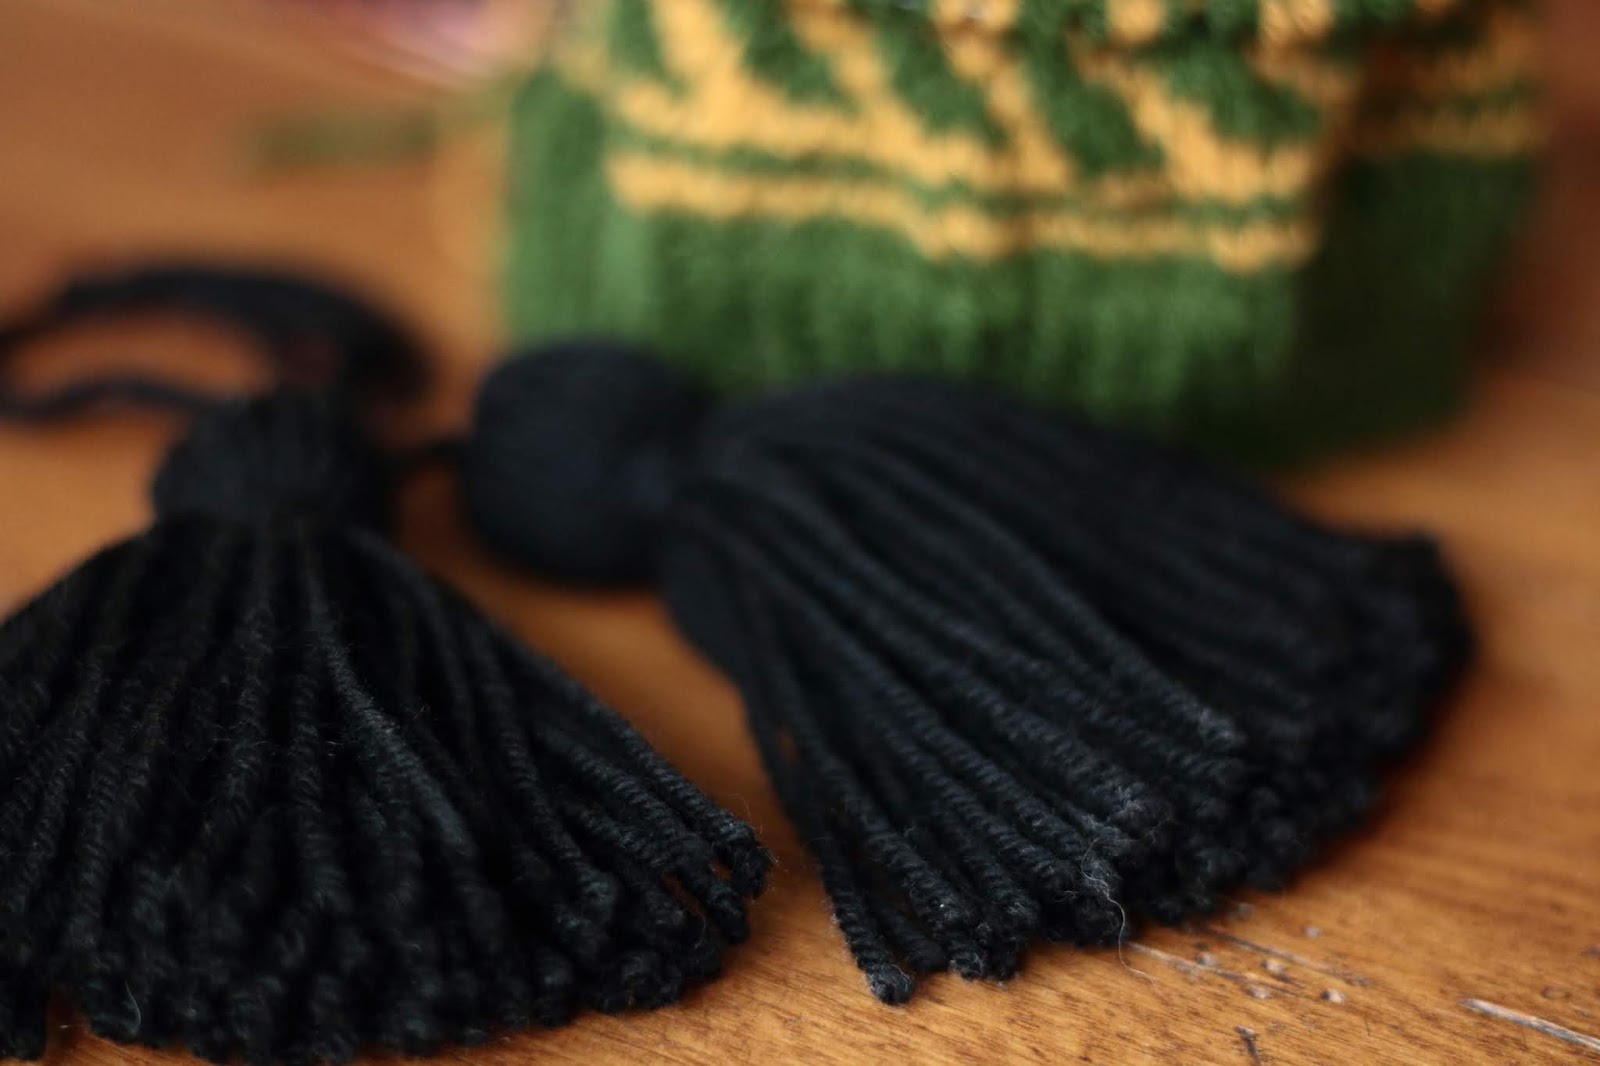
I am committing my 100 days (it started February 18th, 2024) to finishing things. For a start, I began and finished the RCYC MKAL this past month. I even knitted it out of my stash, which, in some way, feels like “finishing” something, in that I am using yarn I purchased any number of years ago — that stripe? It’s from Lorna’s Laces, “Bravery” from the old the Harry Potter line of sock yarn. Of course, now I have some little puny leftover bits of sock yarn in three colors, but that’s another finishing issue for another time.

I am allowing myself to wander through my stash, my notes, journals,  my unfinished designs, lists of patterns that I have meaning to make for myself but never have. I am giving myself grace to complete what I find, or admit that I never will and pass it over or pass it on to another who might enjoy it.

My next project will be the 2021 RCYC MKAL that is no longer a mystery. I put it  down back in 2021 when I became frustrated with the final Brioche edging. The instructions for “Meditations” by Theressa Silver were fabulous, the pattern was complex but clear, but I was listening to the 30+ hour Audible version of Anne Radcliffe’s The Mysteries of Udolpho at the same time I was knitting. Turns out you can’t successfully  learn new knitting skills while simultaneously listening to the very first gothic novel filled with the most entertaining types of melodrama: damsels trapped in towers by villainous men who were just pretending that they wanted to marry damsel’s older aunt for love; young men in the spirit of  D’Artagnan or Wesley (aka The Dread Pirate Roberts) overcoming all odds to save their maidens, conquering all with True Love; and the ever-popular, dark haunted castles that provide terror and intrigue for all, Dorian Gray style.

The Mysteries of Udolpho, with all its bodice ripping, supernatural fun and fainting, and this persistent nagging in the back of your mind, wondering how a woman published this novel under her own name in 1794, does not go well with trying to learn Brioche on US1 needles and fingering weight yarn.

Now that I have fresh interest and a little more shawl- knitting experience, I have unearthed my 2021 from the stash graveyard, flicked off the maggot

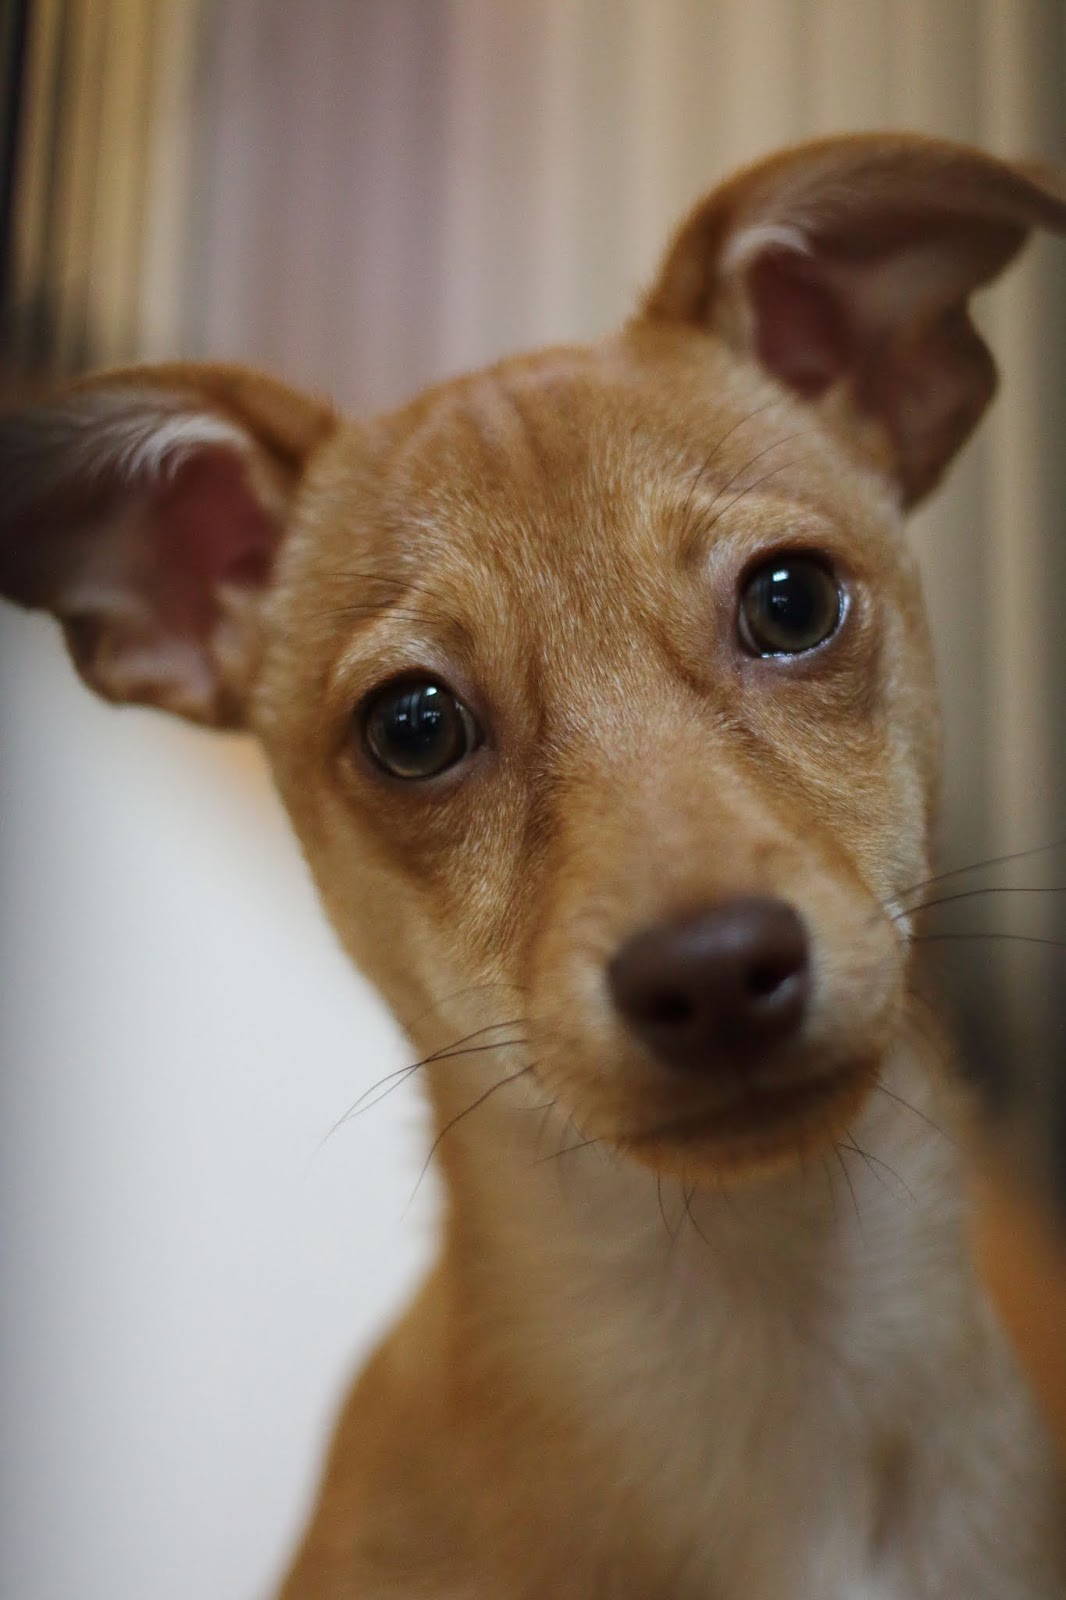
dust, ripped back the ruined Brioche, untangled the mess, pulled out the dog hairs,  read the notes and realized that this shawl had more mistakes than just the Brioche. So, in gothic fashion, I will be reassembling this shawl monster from its disjointed parts, calling it good, and hoping that no one else notices its reanimation.

Oh, and I am hoping that part of this finishing business will also bring some new, finished, never-before-seen patterns! Stay tuned … we’ll see if I write another blog before 2026.


Blog Posts · Free Patterns

Kick-off blog post and a free pattern!

Plain Jack & Jane Watchman’s Caps make great ocean viewing!

Hello, fellow fiber lovers!

This is my first blog post on the new website and we are going to dive right in. Let me first say how glad I am you are here! Please visit often 🙂

I have been blogging on and off since 2011, and really let’s call it “dabbling,” as it’s been more “off” than “on.” At first, I was using the blog to practice writing and to casually share my joy of knitting.

However…

Over this past year I have been thinking. Really thinking. About what I want to do with the blog. Things are very different for me now in the crafty realm. I have 12 years of knitting under my belt (along with the potato chip Covid-19) and I find myself itching to share the love. I might even share my chips if the opportunity presents.

Here is the plan:

  • Share a weekly or bi-weekly post that includes a free pattern or a new tutorial.
  • Share progress on patterns that are upcoming and will be for sale in my Etsy and Ravelry shops.
  • Show you my clunky progress in crochet and crochet pattern writing — yikes!
  • Share anything cool I find that might interest other knitters or crocheters or any other crafty people. These may not always be fiber art related.
  • Share this years’ progress on my craft fair adventure
  • I plan to create video and written/photo tutorials for the site as well!

Let’s kick it off with my latest pattern release, Plain Jack & Jane Watchman’s Cap.

You can purchase a downloadable pdf pattern that contains all the sizes from preemie to Large adult for sale in my Ravelry and Etsy shops!

Here is the adult medium size for free:

Plain Jack & Jane:
Ye olde Watchman’s Cap

Watchcaps became popular with seamen in the 1940’s and 50’s. They were dense, worsted wool and they protected sailors’ heads nicely from icy wind and weather as they stood watch or performed other duties aboard their ships.

They are still popular today. My brother, a real-life Navy man turned Merchant Marine, and a nice guy to boot, loves hats like these as they stay on when you are on deck of a moving ship since they are nicely head-hugging. He says the wind doesn’t easily blow them off and they keep his head warm, even in the iciest of winds.

This is an amazingly easy knit and is a lovely palate cleanser after a complicated project. It is also a good place to start if you are new to hat knitting.

This pattern does not, as shown above, intend to stop completely above the ears. We will extend our watchcap to protect our precious lobes. No offense, history. I just hate cold ears.

These hats are knit up in one piece and, for the simplest project, made in a single color. If you’d like just a tiny bit more spice to your hat, there is an option for a two-color hat with a friendly, tiny tweak to hide the color change inside the fold, hidden away from public view.

The band of ribbing is meant to be long, to create a squishy, thick fabric sitting around your chilly ears. You can easily make your band shorter for a more traditional fold, or even a bit longer than the pattern suggests. You can even make the fold as long as the body of the hat, ending it at the same length the decreases start! Just keep in mind: the longer the band, the more yarn it requires.

The Pattern


Ribbing
Using Main Color (A) and circular needles (or dpns if desired), CO 100 stiches. Place stitch marker at the beginning of the round, join stitches in the round taking care not to twist them.
R1: *K1, p1; repeat from * to end of round.
Repeat round 1 until ribbing measures 4.25in/11cm from cast-on edge; approximately 26 more rounds.
Next round: Knit to end of round. (100 total stitches.)

Body
For two-color hat only:
Purl one round with Main Color (A). Break main color.
Purl one round with Contrast Color (B). This color change will be hidden in the fold of the ribbing in the finished hat. Continuing with (B), proceed to body instructions for both hats, shown in the next section (below the pics)


For both one and two-color hats:
Knit all stitches until hat body measures about 5.25in/13.5cm from the beginning of the stockinette section (excludes ribbing).


Crown decreases
R1 (Set-up): *K20, pm; repeat from * to end of round (5 sections of 21 stitches created).
R2: *Knit to two stitches before each marker, k2tog, slip marker; repeat from * to end of round.
Repeat R2 (Switch to dpn’s when there are too few stitches for 16in/41cm circular needles): 18 times (10 stitches remain).

Finishing
Break yarn, leaving a tail about 6-8in/15-20cm long. Use a darning needle to cinch remaining stitches tightly together. Weave in all ends and, for best results, lightly block your hat.


Wear with pride … in the iciest wind.

Optional Pom Pom
If you are a pom pom sort of person and would like to embellish your hat with one, you can opt to use a store-bought pom pom or make your own. Here are some pom pom resources, including a tutorial from my blog. (My favorite is the Clover pom pom maker!):
Resources for Pom Pom Making
Using a cardboard form
Using a Clover pom pom maker

Here are some photos to aid you in seeing the details of the finished product:

Stay tuned! This is the first in a series of watchcap-style hat patterns. The ribbings will all be worked from the “wrong side” to make the “public side” clean and attractive! Next up, and in testing now, “Fresh Ribs!”

©Freckled Girl Knits 2021

About me

Hi, friends! I’m Janelle! I’m a knitter, crocheter-in-training, sewist and all around lover of crafts. I enjoy literature (especially through the CraftLit podcast!), learning anything new, travelling (Europe you are next on the bucket list!)

I was born and raised in Portland, Oregon. And, while I have lived all over the U.S. in adulthood, I call it home once more. I have 6 kids, a cute hubby and a dog, Beans, The Ginger Chiweenie. We like to pretend he is a super hero that fights crime.

While knitting made me frustrated as a child (think shiny, slippery aluminum needles) I tried again at the very strong suggestion of a tough, sweet and caring, older firecracker of a woman at church. When I resisted, saying I “could never” knit like her (and so I shouldn’t try), she demanded that I just do it and refused to hear any excuses. She did me a favor that day. Now, I am a true knitting enthusiast, and so many other things have opened to me because of Mona, my friend. She is gone now, all these years later, but I still carry on her command: “You go to the store, you get the supplies and you DO it!” I especially like the part where you get to go the the yarn shop. 😉

I am glad you stopped by and, here on the website, I hope to encourage you to be curious to try and learn new things and to dive in to knitting (or any other craft your heart desires) for real. The world of fiber art is ever-expanding and its all yours. Techniques, ideas, inspirations and patterns to try new skills are what I am planning for this site.

Site mantra: Never give up, never surrender! I know I borrowed that from Galaxy Quest. But Mona would agree.

Uncategorized

Heroes are Here! New Pattern, Partie Deux! (Plus a little history on the caduceus)

Heroes!

I created this pattern in honor of all the heroes in the medical field who go to work every day to help us all. Knit a hat, give it or keep it and post a pic of your finished product on Instagram to share the love! Hats up for those who help! And, as I said last post, this pattern series — Villains and Heroes — is free. Instead of paying for a knitting pattern, I simply suggest a donation to a charity of your choice that is helping people harmed by Covid-19. You can check out my previous post for more details on that.

Let\’s talk about a little fun fact: The caduceus, as a medical symbol, is actually a sort of \”misnomer,\” in a way. Apparently, over the years (and Wikipedia alleges the U.S. is mostly to blame), the caduceus has accidentally replaced the Rod of Asclepius, which is the \”real\” medical symbol. While the ancient Greek god Asclepius was considered to be the god of healing and medicine and carried a rod with a single snake, the Rod of Asclepius,  or the caduceus was actually the rod of Hermes, herald, messenger, teller of things … cool guy with wings on his feet … Paul Schaffer in Disney\’s Hercules … and the caduceus was carried in ancient times, by humans of Hermes\’ same occupation.

According to Wikipedia, \”The modern use of the caduceus as a symbol of medicine became established in the United States in the late 19th and early 20th century as a result of documented mistakes, misunderstandings and confusion.\”


Anyway, it is used instead of the \”correct\” Rod of Asclepius as a symbol of medicine nowadays. But really, what are symbols and traditions but social constructions? Things we, as a society, have decided together over time? Maybe we should just let the caduceus stand! I\’m goin\’ with it. I give you all my pattern, Heroes. (Sounds sort of Greek, doesn\’t it?) You can get the pattern in my Ravelry store as a free download. Forever. Knit on, friends, knit on!

Your knitterly friend,
Janelle


Heroes and Villains
Heroes
By Janelle serio
This stranded colorwork beanie is the second pattern in my Heroes and Villains set. Of course, you can tell from the pictures that this hat represents some of the heroes of today’s pandemic. Featuring the traditional caduceus (“ka-doo-she-us”) symbol— with its familiar staff, snakes and wings—along with some impressionistic crosses to represent the medical profession, this hat is a nod to those in the medical field who endanger themselves every day for the rest of us.
These patterns are and will remain free patterns so anyone can make and wear or make and give a hat to show solidarity with those most affected by Covid-19. If you feel so inclined, please feel free to donate to a charitable cause that helps those in need at this time. If you need some ideas, there are a few listed on the pattern page.

A word on sizing for this pattern

The size of this hat is determined using knitting gauge
·  Toddler/Child: 7st/8rounds/inch/2.5cm
·         S/M Teen/Adult: 6sts/7rounds/inch/2.5cm
·         M/L Adult: 5st/in/6rounds/inch/2.5cm


This can be accomplished by using an approximate corresponding yarn weight of:
·        Toddler/Child size: fingering weight
·         S/M Teen/Adult size: dk/sport weight
·         M/L Adult size: worsted weight


To fit head circumference (range):
·         Toddler/Child: 16-18in/41-46cm
·         S/M Teen/Adult: 19-21in/48-53cm
·         M/L Adult: 22-23in/56-58cm

Any yarn/needle combination that gives the gauges listed above will work for its corresponding hat size. Check your gauge in a portion of the colorwork pattern after blocking. Please use a combination of yarn and needles that gives your desired gauge for accurate sizing.

Finished hat size after blocking
Circumference: 15.5in/40cm (18in/46cm, 21.5in/8.5cm)
Length: 6.6in/16.6cm (7.5in/19cm, 9in/23cm)

Fit: This hat is designed with just a little extra length in all sizes to be soft and a bit slouchy. It has a firmer ribbing at the start to help hold it on, but choose your size according not only to your recipient’s actual head size, but also how you’d like your hat to fit.
In the photo on the front page of this pattern, the sample I am wearing is an adult M/L and my head is 21.5inches in circumference, and my actual crown height (measured center-top of head to ear lobe) is 8.5inches. 

Materials

Estimated yarn amounts (These are only estimates. Everyone uses a different amount of yarn when they knit! Be sure to have extra on hand.):
  • Toddler/Child: 122yds/112m total; 50yds/46m MC; 36yds/33m CC1; 36yds/33mCC2
  • S/M Teen/Adult: 126yds/115m total; 50yds/46m MC; 38yds/35m CC1; 38yds/35CC2
  • M/L Adult: 155yds/142m total; 62yds/57 MC; 47yds/43m CC1; 47yds/43m CC2

Yarn suggestions
Toddler/Child: Fingering weight yarns, some thicker dk sock yarns also work up at the desired gauge for this pattern (7st/inch/2.5cm) or can be made to using the right needles.
S/M Teen/Adult: Plymouth Dreambaby DK, Cascade 220 Superwash (I know it says worsted, but for me it always works up at dk weight!)
M/L Adult: Rowan Pure Wool Worsted, Cascade 220 (worsted)

Tools
Toddler/Child: One set each of US3/3.5mm and US5/4mm 16in/41cm circular needles; one set of US6/4mm dpns.
S/M Teen/Adult: One set each of US5/3.75mm and US7/4.5mm 16in/41cm circular needles; one set of US7/4.5mm dpns.
M/L Adult: One set each of US6/4mm and US8/5mm 16in/41cm circular needles; one set US8/5mm dpns.
All sizes: Stitch markers, a darning needles and scissors.

Abbreviations and special stitches
CO: Cast on
R: Indicates round number
K: Knit
MC, CC: Main color, contrasting color
K2tog: Knit two together
*to*: Indicates a repeat section
K1fb: Knit into next stitch as usual, leave stitch on needle, knit the same stitch a second time through the back loop. Stitch completed.
<!–[if gte vml 1]>


A word on sizing for this pattern

The size of this hat is determined using knitting gauge:

·         Toddler/Child: 7st/8rounds/inch/2.5cm

·         S/M Teen/Adult: 6sts/7rounds/inch/2.5cm

·         M/L Adult: 5st/in/6rounds/inch/2.5cm

This can be accomplished by using an approximate corresponding yarn weight of:

·         Toddler/Child size: fingering weight

·         S/M Teen/Adult size: dk/sport weight

·         M/L Adult size: worsted weight

To fit head circumference (range):

·         Toddler/Child: 16-18in/41-46cm

·         S/M Teen/Adult: 19-21in/48-53cm

·         M/L Adult: 22-23in/56-58cm

Any yarn/needle combination that gives the gauges listed above will work for its corresponding hat size. Check your gauge in a portion of the colorwork pattern after blocking. Please use a combination of yarn and needles that gives your desired gauge for accurate sizing.

Finished hat size after blocking

Circumference: 15.5in/40cm (18in/46cm, 21.5in/8.5cm)

Length: 6.6in/16.6cm (7.5in/19cm, 9in/23cm)

Fit: This hat is designed with just a little extra length in all sizes to be soft and a bit slouchy. It has a firmer ribbing at the start to help hold it on, but choose your size according not only to your recipient’s actual head size, but also how you’d like your hat to fit.

In the photo on the front page of this pattern, the sample I am wearing is an adult M/L and my head is 21.5inches in circumference, and my actual crown height (measured center-top of head to ear lobe) is 8.5inches.

<![endif]–>

<!–[if gte vml 1]>

Materials

Estimated yarn amounts (These are only estimates. Everyone uses a different amount of yarn when they knit! Be sure to have extra on hand.):

Toddler/Child: 122yds/112m total; 50yds/46m MC; 36yds/33m CC1; 36yds/33mCC2

S/M Teen/Adult: 126yds/115m total; 50yds/46m MC; 38yds/35m CC1; 38yds/35CC2

M/L Adult: 155yds/142m total; 62yds/57 MC; 47yds/43m CC1; 47yds/43m CC2

Yarn suggestions

Toddler/Child: Fingering weight yarns, some thicker dk sock yarns also work up at the desired gauge for this pattern (7st/inch/2.5cm) or can be made to using the right needles.

S/M Teen/Adult: Plymouth Dreambaby DK, Cascade 220 Superwash (I know it says worsted, but for me it always works up at dk weight!)

M/L Adult: Rowan Pure Wool Worsted, Cascade 220 (worsted)

Tools

Toddler/Child: One set each of US3/3.5mm and US5/4mm 16in/41cm circular needles; one set of US6/4mm dpns.

S/M Teen/Adult: One set each of US5/3.75mm and US7/4.5mm 16in/41cm circular needles; one set of US7/4.5mm dpns.

M/L Adult: One set each of US6/4mm and US8/5mm 16in/41cm circular needles; one set US8/5mm dpns.

All sizes: Stitch markers, a darning needles and scissors.

Abbreviations and special stitches

CO: Cast on

R: Indicates round number

K: Knit

MC, CC: Main color, contrasting color

K2tog: Knit two together

*to*: Indicates a repeat section

K1fb: Knit into next stitch as usual, leave stitch on needle, knit the same stitch a second time through the back loop. Stitch completed.


<![endif]–>

The Pattern
CO 96stitches using CC1 and smaller circular needles.
Join in the round, taking care not to twist.
R1:*k1, p1* repeat from *to* to end of round.
Repeat R17 more times. (8 rounds completed)
R9:*k7, k1fb* repeat from *to* to end of round. Do not break CC1 yet.  (12 stitches increased, 108 stitches total, 9 rounds completed.)
The body of the hat
Switching to larger circular needles and, using stranded knitting technique and MC and CC1, begin knitting color chart. Break CC1 after round 2 and pick up CC2. Continue on to complete color chart (Pattern repeats three times around the hat).
Once chart is complete, break both yarns. Pick up CC1 for crown decreases.
The crown
Using CC1, begin crown decreases:
R1: *k10, k2tog* repeat *to* to end of round
R2:*k9, k2tog* repeat *to* to end of round
R3:*k8, k2tog* repeat *to* to end of round
R4:*k7, k2tog* repeat *to* to end of round
R5:*k6, k2tog* repeat *to* to end of round
R6:*k5, k2tog* repeat *to* to end of round
R7:*k4, k2tog* repeat *to* to end of round
R8:*k3, k2tog* repeat *to* to end of round
R9:*k2, k2tog* repeat *to* to end of round
R10:*k1, k2tog* repeat *to* to end of round
R11:*k2tog* repeat *to* to end of round (53 rounds completed, 9 stitches remain)

Finishing
Cut a long enough yarn tail to run through all the remaining stitches using a darning needle. Cinch stitches tightly together, tie off inside hat. Weave in all ends.
For best results, we block finished hat to smooth out colorwork stitches.
Colorwork chart
Pattern repeats 3 times around the hat. And in case anyone wondered: yes. This chart was a brainbuster.


Blog Posts · Free Patterns

New free pattern! Villains! Released today!

Hello, all! Hope this post finds you all well and happily knitting away. Here is the first of two hats in my series \”Heroes and Villains!\” Or as my friends have been calling these: \”pandemic hats.\” Testing is over and I am ready to give this to you! You can use the pattern I\’ve provided here on the blog, or if you\’d like a pdf download (also free), please visit me on my Ravelry Shop page. 
This pattern — and the second one in the series, \”Heroes\” — will remain free. Instead of paying for the patterns, I would love to suggest a donation of any amount to a charity of your choice that is helping people in this great time of need. Here are a couple:
1. Feeding America has been supplying food banks for many years and has a Covid-19 program. Here is the link to the donations page.
2. Give Directly has been giving money to those in need around the world for many years. They also now have a special program for the US: cash to those who need it most. 
3. Local Hospitals around each of us might have some patients who are hospitalized with Covid-19 (this happened to a young woman at my church), survive and then have a large hospital bill to pay. Hospitals usually have programs to help people pay their bills; check your local hospitals for more. 
If you know of any other worthy charities, please feel free to share them in the comments below! Enjoy the pattern!
Standing in solidarity with those most affected by this virus! If you make one of these patterns, please tag me on Instagram @freckledgirlknits with pics! 

Heroes and Villains
Corona virus slouchy Hat
(The villain)
By Janelle Serio


This slightly oversized stranded colorwork hat was born out of an inexplicable desire to knit something with a corona virus on it. Whether this drive came from a longing to control my surroundings (which we all know are not within our control), show solidarity with those who are afflicted most by Covid-19 or just to “call the virus out,” as if that could accomplish something. I cannot say.  
 At first, I was thinking of creating a fundraiser out of this pattern and its sister pattern, “Heroes,” but it makes more sense to me to offer these patterns for free to all. Make a hat for yourself, a loved one or someone you know in the medical field who goes to work every day to help care for us all, and risk their lives in doing so.

After you make the hat, please feel free to donate what would be the price of a knitting pattern instead to an organization of your choice who is helping people most affected by the pandemic. For charity organization ideas, see the pattern page.

A word on sizing for this pattern

The size of this hat is determined using knitting gauge:

·         Toddler/Child: 6st/7rounds/inch, 2.5cm
·         S/M Teen/Adult: 5sts/6rounds/inch/2.5cm
·         M/L Adult: 4.5st/in/5rounds/inch/2.5cm

This can be accomplished by using an approximate corresponding yarn weight of:
·         Toddler/Child size: dk/sport weight
·         S/M Teen/Adult size: worsted weight
·         M/L Adult size: aran weight

To fit head circumference (range):
·     Toddler/Child: 17-18in/43-46cm
·         S/M Teen/Adult: 21-22in/53-56cm
·         M/L Adult: 22-23in/53-58cm


Any yarn/needle combination that gives the gauges listed above will work for its corresponding hat size. Check your gauge in a portion of the colorwork pattern after blocking. Please use a combination of yarn and needles that gives your desired gauge for accurate sizing.

Finished hat size after blocking

Circumference: 16in/41cm (20in/51cm, 21in/53cm)
Length: 8in/20cm (9.5in/54cm, 11in/28cm)

Fit: This hat is designed with extra length in all sizes to be soft and slouchy. It has a firmer ribbing at the start to help hold it on, but choose your size according not only to your recipient’s actual head size, but also how you’d like your hat to fit.
In the photo on the front page of this pattern, the sample I am wearing is an adult M/L and my head is 21.5inches in circumference, and my actual crown height (measured center-top of head to ear lobe) is 8.5inches.

<!–[if gte vml 1]>

Materials

Estimated yarn amounts (These are only estimates. Everyone uses a different amount of yarn when they knit! Be sure to have extra on hand.):

Toddler/Child: 135yds/123m total; 81yds/74m MC, 54yds/50m CC

S/M Teen/Adult: 140yds/128m total; 84yds/77m MC, 56yds/51m CC

M/L Adult: 170yds total, 102yds MC, 68yds CC

Yarn suggestions

Toddler/Child: Plymouth Dreambaby DK, Cascade 220 Superwash (I know it says worsted, but for me it always works up at dk weight!)

S/M Teen/Adult: Rowan Pure Wool Worsted, Cascade 220

M/L Adult: Lamb’s Pride Worsted, Sheepish by Vickie Howell (used in sample)

Tools

Toddler/Child: One set each of US3/3.5mm and US5/4mm 16in/41cm circular needles; one set of US6/4mm dpns.

S/M Teen/Adult: One set each of US5/3.75mm and US7/4.5mm 16in/41cm circular needles; one set of US7/4.5mm dpns.

M/L Adult: One set each of US6/4mm and US8/5mm 16in/41cm circular needles; one set US8/5mm dpns.

All sizes: Stitch markers, a darning needles and scissors.

Abbreviations and special stitches

CO: Cast on

R: Indicates round number

K: Knit

MC, CC: Main color, contrasting color

K2tog: Knit two together

*to*: Indicates a repeat section

K1tbl: Knit through the back loop/leg of the stitch instead of the usual front one.

K1fb: Knit into next stitch as usual, leave stitch on needle, knit the same stitch a second time through the back loop. Stitch completed.


<![endif]–>

The pattern

CO 98stitches in CC using smaller circular needles.
Join in the round, taking care not to twist.
R1: *k1tbl, p1* repeat from *to* end of round.
Repeat R1 10 more times. (11 rounds completed)
R12: *k23, k1fb* repeat from *to* 3 more times. End of round, 4 stitches increased. (4 stitches increased, 102 stitches total, 12 rounds completed)


The body of the hat

Switching to larger circular needles and, using stranded knitting technique in MC and CC, knit color chart. (The chart repeats three times around the hat.) Do not break yarn once chart is completed. (47 rounds completed)


The crown

Using MC *k49, k2tog* repeat from *to* one more time. End of round. (100 stitches) Break MC.
Using CC, begin crown decreases:
R1:    *k8, k2tog* repeat *to* end of round
R2:     Knit
R3:    *k7, k2tog* repeat *to* end of round
R4:     Knit
R5:    *k6, k2tog* repeat *to* end of round
R6:    *k5, k2tog* repeat *to* end of round
R7:    *k4, k2tog* repeat *to* end of round
R8:    *k3, k2tog* repeat *to* end of round
R9:    *k2, k2tog* repeat *to* end of round
R10:  *k1, k2tog* repeat *to* end of round
R11:  *k2tog* repeat *to* end of round (58 rounds completed and 10 stitches remain)

Finishing

Cut a long enough yarn tail to run through all the remaining stitches using a darning needle. Cinch stitches tightly together, tie off inside hat. Weave in all ends.
For best results, we block finished hat to smooth out colorwork stitches.

Colorwork chart

Pattern repeats three times around the hat.


Uncategorized

A Seafaring Man is LIVE! (Save 20%, no coupon needed!)

Hello, all! Just a note to let you all know that my new hat pattern, \”A Seafaring Man,\” is now live. And it is 20% off in my Etsy shop and in my Ravelry shop until this Sunday! No coupon needed!

The hat pattern has: three crown options; color charts for each of the 9 sizes in the pattern; a tutorial for the tassel option; and a tutorial for the the seamed, \”inside out\” 3-needle bind-off I used for the square topped crown. (Secret note: there are also recent posts here on the blog for help with those, and for help with pom poms! Check below this post for more info!)

The crown and embellishment choices in the pattern make for many different hats!

Enjoy, and if you make one of my hats, I\’d love a shout out from Instagram @freckledgirlknits, or you can post to my Facebook Page of the same name!

A big thank you to my Ravelry testers from the Free Pattern Testers group. I couldn\’t have down it without them! And their hats are spectacular!

In other pattern news, in two weeks, on May 15th, I will be releasing Villains and Heroes! Both hat patterns will be free. Instead of paying for a pattern, I suggest a donation in any amount to a charity of your choosing. More on that in a couple of weeks!

Happy knitting,

Janelle 💓

Blog Posts · Free Patterns

Heroes and Villains: Some new free patterns are in the works!

My sweet brother the Merchant Marine sent me this
after I sent him some masks as he is home but
quarantined on his ship. He said, \”I\’ll be proud
to wear these, sis.\”

Hello, all! I sincerely hope you all are doing well, and your families too. We are healthy in our family right now (we think my son had Covid-19 but he is too young to be tested at 26. He was sick a long time, but is now doing well.)

 In addition to doing the homeschool-mom-thing with 11-year-old daughter, I have been working hard on finishing as many designs as possible in the time I have here at home. Working hard also forces focus and helps to control the anxiety that was, at first, always at the front of my mind when the pandemic started, is now usually playing in the background, so to speak, but also which occasionally tries to come out and attempt to wreak havoc on my attempts to feel somewhat normal in this time. Sound familiar to you too? I am sure it does.

Reading social media posts about the anxieties of others, talking to concerned friends and family over Zoom and even the weird new behavior of neighbors crossing the street as they approach you when you take a walk (or perhaps you cross the street first, but I digress…) are all a snapshot, not only of a moment in time, but possibly also of a forever-changed world; one that we don\’t know the shape and size of yet. The uncertainty is palpable.

And the current atmosphere doesn\’t just feel like a bizarre exercise in social distancing. It feels very often to many of us like war. Like WWII, to be precise.

Also from my bro, the man for whom \”A
Seafaring Man\” was designed.

I can\’t tell you the number of times I see someone making masks on social media–or make some
myself–that calls to mind Rosie the Riveter and her posters from \”back then.\” Now, we have some similar images for the war on this disease, where one of our only defenses is to back away from one another. Stay away from each other and don\’t breath each others\’ air, they tell us. As crafting community, we have made so many masks that JoAnn\’s is now reporting totals nearing 68 million masks, all made to donate by crafters. And that doesn\’t  even count those of us who do it on our own, helping family, neighbors and friends with some! WOW!

Crafters!! YOU ARE MIGHTY!! 

Yet, even with this positive force in the crafting world, I found myself inexplicably wanting to do something else. Something to help those in need — especially financially at this time. I keep thinking about those who are poorest, the kids with no school lunches right now to be their one meal of the day, and I keep wondering about those who had Covid-19 and were hospitalized … but lived. Now what for them? Possibly a huge medical bill with no job? A way to pay?

So I got thinking.

Here is the link to my Ravelry project page for a little more info!

There are charities right now helping these very folks. Lots of them. The food banks being in great need, first of all. Feed America is the biggest one in the US, for example. Then there is another charity I was fascinated by: Give Directly\’s Covid-19 response. They actually give cash to those who need it most. And they\’ve been doing it for a long time. The third organization I thought of was the hospitals themselves. Did you know that individual hospitals have funds to help those in need pay their medical bills? They do!

All of these worthy organizations had my attention. I thought, what if I created a knitting pattern? One that could depict the situation right now? I could sell it and the proceeds to go to one of these organizations. Or I could break up the proceeds and give to all three.

Then I thought, no. I wanted anyone who wants to knit a pattern like that should be able to have it.

Here is a link to my Ravelry project page for more info

For free. If anyone who makes one of these patterns would like to help in any way, please donate to a charitable organization of your choice.

As I mulled over what image might shows today\’s troubles, the one pattern turned into two. I chose to focus on the Villains and the Heroes. The virus itself is the Villain, obviously, and the Heroes I chose to focus on are the medical professionals who battle this thing day and night (incidentally, a close classmate of mine from college — she is an RN and I am an RDH — just recovered from this Covid-19. She is one of many, I realize.). I acknowledge there are many other heroes: the kids working at fast food places; the people in the grocery stores.The Postal workers, police and firemen. All amazing humans. I honor them as well!

They were all on my mind as I worked on these two patterns. Who knows? Maybe I have a few more patterns in mind. If people are interested, then I\’ll create more!

Villains and Heroes are in pattern testing right now, and I am hoping to release them in my Ravelry shop by mid-May. Until then, be safe, do good work, make masks and do whatever else makes you feel helpful and useful.

Uncategorized

How to Make a Simple Yarn Tassel (A Pretty Good One: My Two Cents)

Picture Tutorial for 6(9) in/15(23) cm Tassels
Materials include:
  •   26g/39g worsted weight yarn such as Rowan Pure Wool Worsted 
  •   A 3×6(8×15)in/8×15(20×38)cm sturdy piece of cardboard
  • Two lengths of yarn for tying and wrapping the top areas of the tassel
  • Scissors


1. Starting at the bottom of the cardboard, wrap the yarn around the cardboard the long way about 50 times. This will give you 100 tassel “strands.” If you’d like a fluffier tassel, feel free to wrap even more times.

Don’t wrap too tightly or you might bend your cardboard as I’ve done in the picture below! Tight wrapping might also shorten the length of your tassel or make it harder to remove from the cardboard.


2. Thread a length of yarn about 6in/5cm or a bit longer through a darning needle (or use your fingers) and run the piece of yarn under all the wraps at the top. Tie them together tightly at the top with a double knot. Carefully slide the yarn off the cardboard and lay it carefully onto a table. Smooth a bit if needed.
3.Cut another length of yarn about 10in/25cm long. About 1inc/2.5cm down from the top knot, wrap the yarn several times around all the strands, creating a “neck” at the top of the tassel. Tie off or tuck end into the wraps on the neck.


Carefully sliding a scissors through all the bottom loops, cut through all the loops to create tassel strands.


To smooth out the yarn strands, wet thoroughly as if to block and hang to dry. Once your tassel is dry, trim the ends to make them even. If you want to be fiddly, you can comb the strands out after they dry and before the final trim to really make them even. Tie them onto the corners of you hat!


Blog Posts · Tutorial

Three Needle Bind-Off Tutorial to Seam the Top of a Hat

This is where we begin. Your hat is the desired length.

***NOTE: While the method presented in this tutorial can be used for other knitted hats, my newest pattern, A Seafaring Man, pictured in this post, is currently in testing. If you would like notification once the pattern is released, please PM me on Ravelry for an earburn! Thank you for reading my blog post, and tag me on Instagram @freckledgirl knits if you give 3-needle bind-off a try!***

If you are knitting my newest pattern, A Seafaring Man, and you have never executed a 3-needle bind-off before, I am here to help!

Yes, the crown of the hat can be finished traditionally, with a round top, created using decreases at regular intervals, and that is included in the pattern as well. However, if you are interested in creating a knife-edge, square top, with a seam straight across the top of the hat, then this is the tutorial for you. In addition to the work currently on your circular needles, you will need an extra needle in the same size as your circulars, such as a dpn or straight needle.

(Note: This method will work to finish the top of any hat that has been knitted in the round! Just be sure that your hat is the final height you want it to be before starting the bind-off.)

Once you achieve the desired length of the hat, you are going to very carefully flip the hat inside out and bind off all the stitches together to create an interior seam. Let\’s go!

Add caption
1. Once you achieve the total desired length of your hat, remove the stitch marker and set aside. 
NOTE: If you are working A Seafaring Man, please note that all the sizes have an even number of stitches, so as you work this bind-off, each of your stitches will have a \”partner\” and will match up evenly. 
2. This is a tricky part: without letting your stitches slide off your circular needles, very carefully turn you hat inside out. After that, you might want to slide your ball of yarn through the top so it is on the new \”outside.\” This just makes it a little less fiddly (I have done that here in the photo). Line up your circular needles side by side. You will have a bit of bunchy stitches on the cord of the circular needles. This is okay, but if it really bothers you and feels too fiddly or messy, you could choose to slide all the stitches onto a much longer circular, if you want. That would make it easier to have the stitches side by side. Just be sure to keep the start of the round in the same spot, especially if you are using this to close the top of a hat with a defined front and back. Knitter\’s choice!
If you have done a 3-needle bind-off in the past to seam sweater shoulders, for example, you will notice a difference here. The working yarn is attached to the front needle instead of the back. That\’s ok. This will still work. 
3. Hold the two ends of your circular needle close together with your left hand. Using your extra needle (I used a dpn in US7, just like my circulars), enter the first stitch on the front circular needle (the needle closest to you) from front to back, just as you would to knit a normal knit stitch. Now continue on to do the same for the matching stitch on the circular needle in the back (the circular needle farthest from you). Your extra needle is now going through two stitches, the front one and the back one. 
4. Knit those two stitches together as one. You now have one stitch on the right (extra) needle and all the rest still on the circulars.

5. Repeat steps 3 and 4. You now have two stitches on the extra needle. 
Pictured above, I have done a few bind-off stitches to show the seam starting. 


6.
 Working on the extra needle: slide the first stitch you knitted over the second one and off the needle. You now have one stitch left on the right needle, just as you would in a regular bind-off. 
7. Continue to repeat steps 3-6, working through the stitches on the circular needles. 
8. When you are about halfway through binding off the stitches, you might notice some tension starting on the stitches still waiting to be worked. Fold the cord in half, separating the stitches in half and slide them up to the needles to continue, letting the cord stick out the back, as pictured. Try to be sure that the stitches are divided exactly in half, but if you get to the end and they are not, you can always re-adjust them without too much trouble. (I had to do that on the hat pictured!)
9. Once you have completed binding off all the stitches, cut the yarn, thread it through the remaining stitch/loop and weave in the end! 
Now you can easily flip your hat right side out. Note the nice, clean seam on the top! Once you block it, it will be even smoother. 
A freshly seamed hat, pictured above!
Flipping the finished hat right-side out is much easier than the other way around!
Note: To block these hats (for I have made a few!), I have been soaking them in lukewarm water with some Eucalan, pressing the excess water out in a clean dry towel, and laying them out on another dry, clean towel till dry. Alternately, you could put them on a hat form, too, instead of a towel once the excess water is squeezed out!

Please tag me on Instagram with your projects using the 3-needle bind-off! 
Blog Posts · Tutorial

How-to Make a Pom Pom Picture Tutorial (Don\'t get too excited. No Alchemy Here)

How to Make a Pom Pom without losing too much of your mind, the old fashioned way (with some better tutorials than mine at the end — and it\’s okay if you decide now to scroll down there!)

Ah, the traditional pom pom. Not my fav project. It feels like too much trouble for the outcome. And how many of us have gone seeking real help on YouTube and instead we find an all-too-cheery mom with a kid on each hip telling us in her chipper, shrill tone, \”I\’m addicted to pom pom making! I love them and I just can\’t stop!\” (((laughs maniacally)) Sure, sweetheart. Sure. As a mother of 6 myself, I am here to tell you that you may just need a little more grown-up conversation. Or something…

This video then rushes into hyperspeed, and becomes a blur of wrapping, cutting, yarn, all sped up like time lapse nature photography so we don\’t switch channels before the pom pom is done. And — oh, wait, what did I miss? — a perfect pom pom just appears on the screen and the super chipper mom is back telling us to subscribe. I still don\’t have a pom pom.

Ok. I\’m joking around. Mostly. And there are really are some good video resources out there to help, and other pictorials like this one I am making here. I guess that, for me, there are a couple of truths in pom pom making that are just unavoidable: pom poms are fiddly, more time-consuming than I want them to be and — brace yourself — they don\’t always turn out, and in the worst cases, sometimes you have to start over. That just has to be ok.

With that, let\’s try to make a not-too-irritating pom pom. First, as I say: we must use patience. Make sure you don\’t have a lot of distractions, and that no one is going to imminently need your hands for about 15 minutes — or 20.

We are going to make a pom pom (or two) that is about 3\” in diameter. 

You will need:

  • Firm cardboard, such as from an Amazon box. You know you have one. Or three. I do.
  • Sharp scissors. I\’ve seen some people use tiny surgical scissors or even razor blades (I\’ve actually seen that done!). Sharp is the best — and the safest — option. You don\’t want to slip with a dull blade.
  • About 13-20g of yarn. I used 15g  of Lion Brand Wool Ease for the gold pom pom It\’s the firmest and fluffiest. The green one was made using 12g Red Heart worsted acrylic yarn and the blue guys were made using a total of 13g of Patons Classic Wool.
  • A jar or glass that measures about 3 inches in diameter, more is ok. 4\” might even be better. 
  • Another round object about 1.5 inches in diameter, like the top of a small lotion bottle or even a quarter would work. 
  • A reliable pen. (Why create more annoyance with a pen that won\’t write?)

First, draw two matching circles on your cardboard with the little circles inside them. Just do your best to get them in the center. I know. They look like boobs.

Cut them out, creating a Pacman-like \”C\” shape.
Holding your C-shaped forms together, begin to wrap your yarn, patiently and slowly back and forth around the \”C\’s.\” The trick is to wrap evenly, and use a LOT of yarn. And wrap sort of loosely. If you wrap too tightly, you won\’t be able to slide the blade of your scissors between the cardboard pieces. This will become important in a moment.
My gold pom pom got pretty fat, as you see below, and it turned out to be the best one of the bunch. Thickness is key in order for the pom pom to \”stand\” up on it\’s little c-shaped frame. This will help you tie it. Note: be sure not to creep too close to the ends of the \”C\” when wrapping. That made it harder for me, I think, to hold the looser yarn bits in place after I cut the outside edge. 
Here begins the fiddly part. You will next take your sharp scissors, slide/wiggle the open blade in between the two C-shaped pieces of cardboard and begin cutting the yarn. In the first pic below, I am not showing my left hand holding the yarn while I cut (in order to get the photo), but you\’ll want to hold the yarn onto your C-shaped forms with your fingers, as you can see me doing two photos down.
Go slowly and use VERY sharp scissors for best results. It is almost impossible to cut the yarn when it\’s this thick and your scissors are dull. 
Hold the inside yarn when cutting!
When my outside edge was all cut, I tried to patiently smooth the yarn into place, evening up — just a little — any strands that looked a bit uneven. It worked well, as long as I went slowly and gently. Trust that it will stay mostly in the little form.
Smoothing the yarn out.
Here is another pic of the \”loose\” yarn. It doesn\’t jump out, or
anything, so you can work with it a little. 
I think this may be the hardest part: slide a length of yarn between the pieces of cardboard. I used a piece about 10 inches long.
Below, you can see how it looks once the yarn is nestled all the way between the C-shapes. Preparing to tie!
Carefully tie a very firm knot in the center of the pom pom, holding all the pieces together. (Really — it can work!)
Now you can slide the cardboard out. The C-shaped pieces are reusable, if you liked the ones you made. 
You\’ll have to trim your pom pom to be more even. Don\’t do what I\’ve done in the past: trim wayyyyy too short and have your yarn start to all fall out of your tie!! 
Now you can use your pom poms for something! 
Final tip: watch out when you wash items with pom poms on them. I\’d recommend hand-washing hats, etc, that have handmade poms, just to be sure they don\’t start to lose strands. 
Here are some truly helpful links for more pom pom making:
1. A Rectangle option! 
3. *** This one is my fav **** Sheep& Stitch:  https://www.youtube.com/watch?v=zok9hqyhTQ4
4. Clover Pom Pom Maker (why have I not done this? Seems to solve soooo many problems!!)
Looking forward to your comments, any suggestions you all have!! Please leave them! And if you\’d like, you can tag me on Instagram @freckledgirlknits to show me your pom successes (and failures, too! We all have them!) ! 🙂 🙂 🙂 


Blog Posts · Pattern Shop

A Seafaring Man

What I’m Designing right now: 

My first hat pattern in like, oh, six years is about to enter testing. Tomorrow. I feel sort of nervous — you know, because I\’ve forgotten how the whole testing thing works! By tomorrow\’s end, I will be mostly relieved and hopeful (hopefully) that people will enjoy knitting the pattern. (By the way, if you\’d like to be a tester, I am adding this pattern to the Free Pattern Testers forum on Ravelry. You are welcome to leave a comment here or a pm on Ravlery if you want me to tell you what time that will be 🙂

This week — and yes, long before the pattern testing is finished, which takes usually about a month —  as an additional resource for the new pattern, I will be adding some how-to tutorials here on the blog on tassel making, pom pom making (God I hate those things…) and how to use the 3-needle bind-off. If you haven\’t tried it, it is a great way for a \”seamless\” seam and I love it in lieu of just sewing two fabric edges together. This will be a series of three posts and I will list them in the side bar as links for easy finding in the future.

Dusty tassels. I forgot I hadn\’t dusted the table. Forever.
These babies are about to be tested!

I also have a secret project in the wings which I think I am pretty excited about. working on that. More to come in a week or two or three, depending! Still have research to do on that.

What I\’m reading: 

In addition to Treasure Island through the Craftlit podcast, I am also reading Wuthering Heights by Emily Bronte. (I know tons of you read many books simultaneously, too. After all, reading follows our moods, right?) I have always put it off, but now I\’m all in! What the crap?! Why didn\’t someone tell me this had ghostly stuff in it?! So fab. And, dear reader, you too can find a free version of Wuthering Heights on the Librivox app. If are a lover of classic lit and you have not yet checked out these free audiobooks? DO IT! And look for volunteer reader Elizabeth Klett whenever you can. She reads lots of Jane Austen, a wonderful version (dare I say the best?) Jane Eyre and many, many other titles.


Random Knitting Project:

Knitting Bee. Forcing me to open
my wallet…

Sweet Dreams Baby Blanket by Mrs. Moon. I am too old to be having a baby (I just slid under the closing door having Amy at nearly 40! And now Amy is 11!) but when I was at Close Knit on Alberta in Portland during the Rose City Yarn Crawl I saw this pattern. It was a completed project, just hanging there, tempting me. I don\’t know what it was. The pop of color on a gray background? The tiny, manageable crochet squares for a beginner crocheter like me? It would not leave my mind. By the last day of the crawl, I was at Knitting Bee and caved in. I love Plymouth yarns anyway, but I am really loving the Plymouth Dreambaby DK on the little #3 crochet hook. Butter in your hands. Butta I tell ya!! Maybe someone around me will have a baby. I do have 5 grown kids and only one grandson. So far.


Beans says, what does this all mean? I\’m just a puppy.

Hey, Mom. Check my whiskers. I\’m
nearly a man, now.